
Swedish Bread (or more accurately, Swedish Ring)
A Pictorial Guide
This is one of the big Christmas recipes in the Anderson family (yes, the big one is Vinarterta, but this one was actually done a year earlier because I didn't have the digital camera handy on Vinarterta day). We eat this stuff along with Vinarterta on Christmas morning, and pretty much fill up on it the rest of the Christmas season too. It's always been called Swedish Bread in the family - and it basically is a strong caradamom bread - even though nobody in our family actually makes it into loaves of bread. We have it as a sweet pastry, formed into a rolled ring filled with cinnamon and sugar. The type of thing you'd have for breakfast instead of a Danish. Of course you can make it into loaves of bread if you want - we just don't have it like that. Anyway, the purpose of this page is that in the past relatives and friends asked how it was made, and it usually takes more than one demonstration to get all the technique across. So, with some lengthy narrative and some pictures, hopefully it will be something that somebody reading this can make without a whole lot of potential mishap. The recipe comes from my grandmother on my father's side, but has been made by Andersons long before that. She made it without any written recipe, and she and my mother sat down and tried to put it into written form, which took a number of years to get to something that would turn out consistently. Even as it is, it involves some touch and feel rather than sticking to a precise quantity of ingredients, and the filling is added essentially to taste.
When this is all written down on recipe cards it looks very involved. And it no doubt will with pictures too. But it's really pretty straightforward - it just takes some time. But it's well worth investing the time in.
Before we get started, a couple of notes on things you might not have around the typical Canadian household that you'll need.
- Cardamom
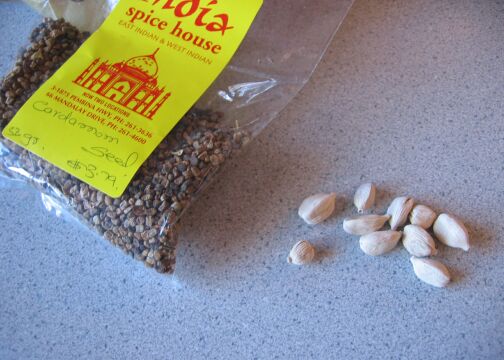
Cardamom is a spice that isn't as common in grocery stores as it used to be, at least around here. It's not too hard to find in (really expensive) jars of ground powder - but you don't want this. It will only disappoint you. What you really want is a non-ground form of cardamom, to maximize the amount of flavour you get from the spice. Your optimum choice is whole white cardamom pods. I used to be able to get these at the supermarket, but for some reason this year everybody quit carrying them (the ones in the picture are from last year, and so will have lost a lot of their strength).
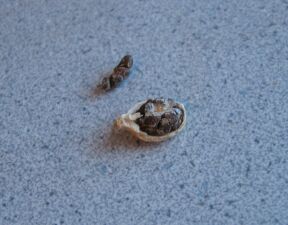
If you get these you'll find them in a bagful - you'll want 90 or so of them, and what you want to do is open them up and pull the seeds out, and discard the pod shells and inner papery parts. This is kind of tedious, but it sure smells nice.
This year I made the rounds of the local Indian spice houses, and they didn't have white cardamom pods either (they all have green ones that are meant to be used whole - you don't want those though). I was lucky enough to find one place that sold the seeds already removed from the white pods though. This is the first time we've tried it this way, and it turned out nicely, so it doesn't seem a big sacrifice in freshness compared to the pods. And it saves a lot of time compared to picking open lots of cardamom pods too (and it was half the price of ground cardamom at Safeway to boot). So, get your cardamom and get it ready. I grind mine in an electric coffee grinder (which I keep really, really clean after grinding coffee - if you don't, you might want to invest in a cheap grinder just for spices). As a tip, don't clean out the grinder after you grind the cardamom - grind some coffee right away and make a pot while you're baking this, the cardamom is amazing in coffee.
- A Really Big Bowl
This is not a small recipe - it makes six decent size rings. I have no idea if the recipe can be successfully reduced in size - that's up to you to experiment with. These freeze very well, though, so you can always stick what you aren't using in the freezer. It's just gold to find some in the freezer halfway through the year that you forgot you had, too. Anyway, because it's a big recipe you'll need a very large bowl to let this rise in. We use a large metal bowl (about 14 inches across by about 8 inches deep) that is only ever used for this (though I guess if you baked large volumes of bread, you'd use it more often). It's The Swedish Bread Bowl, and you'll just have to go out and find something sizable enough to hold the dough.
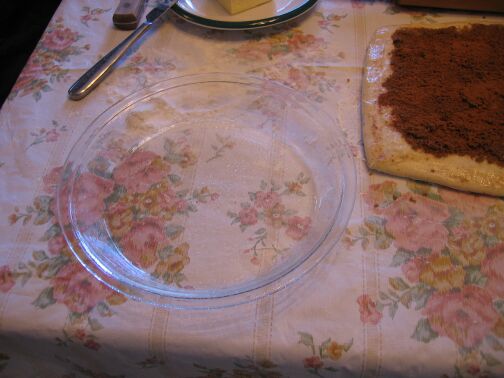
- Lots of Pie Pans
You'll also need six pie pans (we use glass 9-inch pie pans). You bake these in two batches of three (at least that's what fits in any oven we've had - your mileage may vary), so you could get away with three pans in a pinch. However, the pans are not easy to clean up afterward, with all the sugar that's going to be baked onto them, so it saves a lot of grief to just use six rather than doing cleanup in the middle of this. Pie pans that are NOT deep-dish are also better, you'll have less trouble getting the finished rings out of the pans because a knife can slide along most of the bottom if it's stuck in places.
- Lots of plates
Yes, I'm aware most Canadian households have plates. It's just that you'll need around 7 dinner plates to hold all the final product, and you'll need to have these ready when the rings come out of the oven. So make sure you have enough clean plates before you start out.
The only other note I want to make about the whole procedure is that the steps on taking care when you remove these from the pan are really, really important. So read this whole thing before you start, eh?
Ingredients
- 16 cups of white all-purpose flour (you will actually need more than this, plus some for dusting the rolling pin and rolling surface and so on, so make sure you actually have more than 16 cups handy)
- Cardamom - We have used around 90 pods in the past. This sounds like a lot, but it isn't for the volume this makes, and you want it strongly flavoured. Trust me. This year I used roughly half the package pictured above, which amounted to 8 unrounded teaspoons of fresh-ground cardamom.
- 1 cup of sugar, plus a tablespoon or so for the yeast starter
- 5 teaspoons salt
- 4 cups milk
- 1/2 pound butter
- 4 tablespoons yeast (get some fresh yeast if yours has been sitting in the cupboard for awhile)
- 1 cup of warm (not cold, not hot: 43-45 Celsius) water
- 4 eggs
- Brown (I use demerera) sugar (for filling)
- Cinnamon (for filling)
OK, so if you've got everything ready, here's what you do:
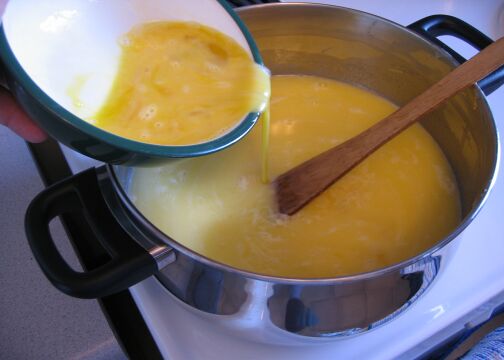
Take the milk at refrigerator temperature, add the butter, the cup of sugar, and the salt to it, and scald it on the stove.
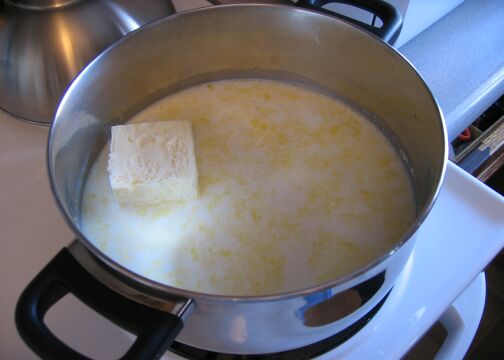
If you use room-temperature butter, the proper scalding temperature should be reached just about the time all the butter is melted. You can tell you've reached the right temperature when you get small bubbles around the edge of the pot:
Once it reaches this point, set it aside to cool - it's going to get yeast and eggs put into it, so you need to make sure it isn't too hot (or the eggs will get scrambled and the yeast will be killed, which would make for some really nasty bread).
Now, start some yeast going. Mix the warm water and the extra sugar together, and stir in the yeast - we use a large measuring cup. Make sure you use fresh yeast! Take the measuring cup you're using for this and sit it in a larger bowl (really, you could likely just use a large bowl for this as well). You'll see why you need to do this in the later pictures.
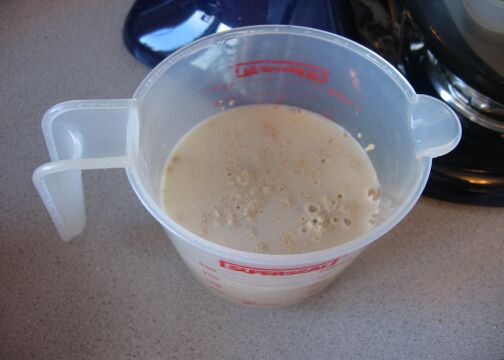
Leave the yeast for ten minutes to proof, while you perform the following steps.
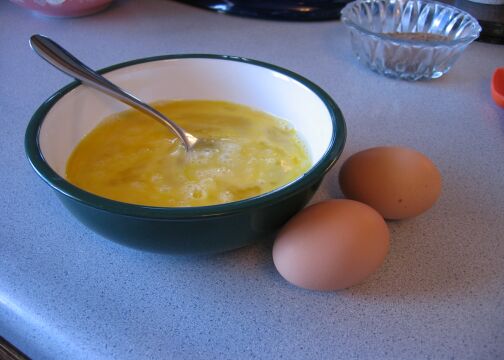
Break the eggs into a bowl and beat them well.
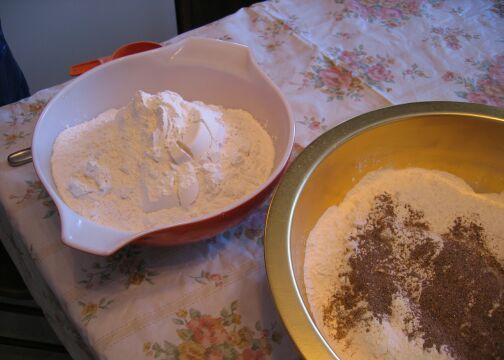
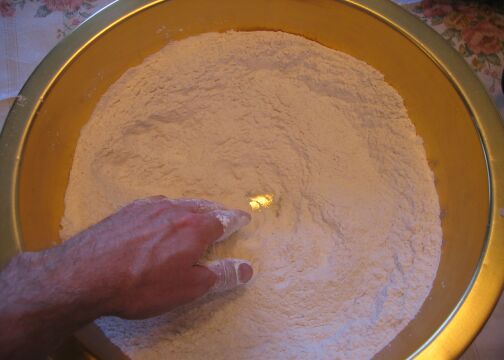
Take half the flour and put it into the Really Big Bowl.

Mix your ground up cardamom into it:
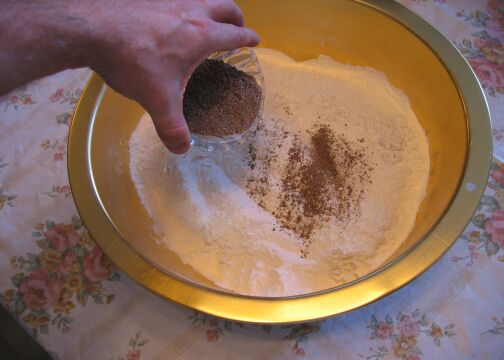
Take the other half of the flour and put it in a separate bowl, so that we can add it in later in batches, once the dough is partly mixed.
OK, by the time you've done all this (OK, wait a little bit yet, because that likely didn't take you ten minutes), the yeast should now look like this (obviously, if it doesn't look like this, your yeast isn't doing well, or your water was too hot, or something was way off, and you'll need a new yeast mixture):
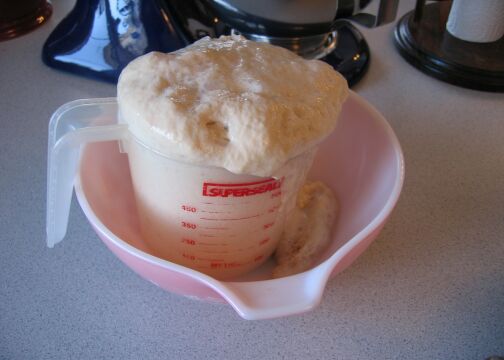
And now of course you can see what the other bowl is for. Don't underestimate the reproductive power of yeast.
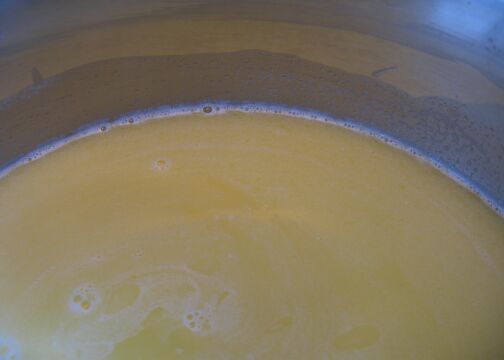
Check that the scalded milk has cooled - a bit on the wrist should feel warm but not hot. A temperature check just on this year's batch produced a temperature of 50 Celsius. You might want to let it cool a little more than that, but it worked well at this temperature.
Beat the eggs into the scalded milk and butter.
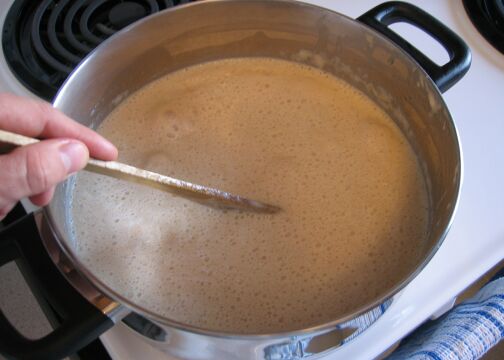
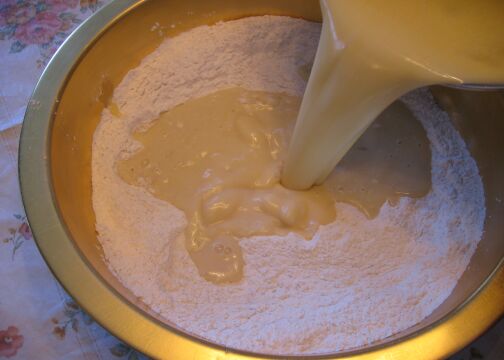
Similarly, stir in the yeast, making sure you scrape out the container (and the bowl to catch the overflow) well. Now all the wet ingredients are together, and we're ready to do some serious mixing. Make a pit in the Big Bowl of flour so that the wet ingredients won't splash everywhere.
And then pour the wet stuff straight in and mix it well.
When this is mixed (it will be very, very gooey) start mixing the other half of the flour (you will want to divide this up into 2 or 3 separate additions).
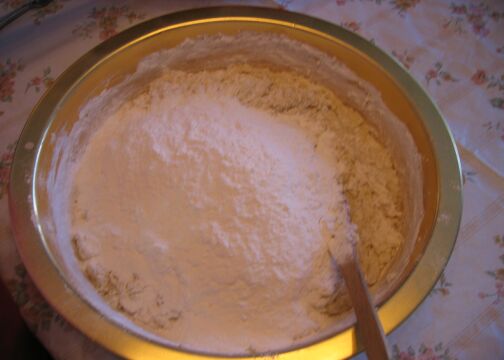
The last addition of flour (maybe even the one before that) is best done with your hands - put some oil on your hands so that the dough doesn't stick to them.
Now, the amount of measured flour will not normally be enough for a proper dough - but how much more you need really depends on the situation. It can vary based on the size of the eggs, the brand of flour, the phase of the moon, who knows what else. But you'll likely need to add more to get the correct consistency. It'll start feeling like really sticky pizza dough and then gradually dry out a bit to a nice, supple dough that isn't too sticky. You don't want to add too much flour, or the dough will dry out and crack. For reference, I added around a cup and a half of flour on top of the 16 cups listed in the ingredients list above.
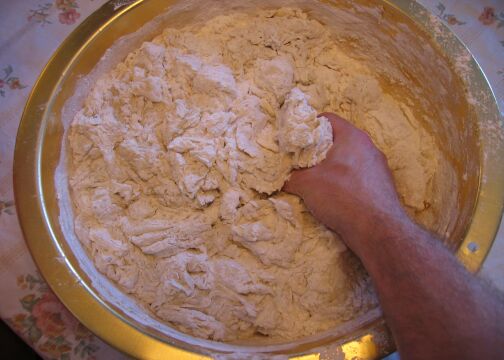
When the dough is approaching a good consistency, turn it out on a floured surface (a plastic cloth is helpful to protect your table - hopefully you have one that is less tacky than this :P )
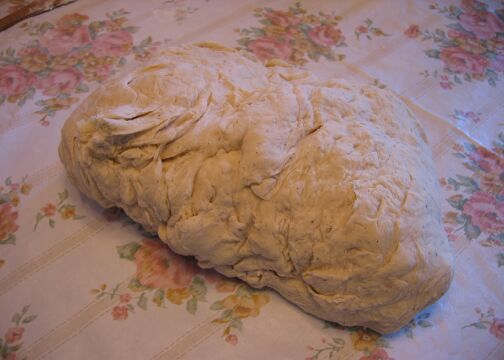
Now you need to really knead the dough heavily - the amount of time you spend doing this should be about ten minutes, including the time you spent working the last of the flour in by hand. Don't scrimp on the kneading, or you'll get a bread that's too heavy.
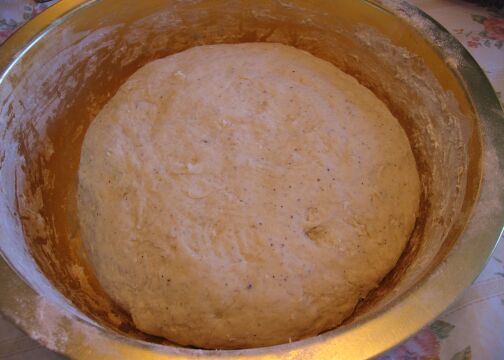
When you're done kneading it, the dough should look more or less like it is in the next picture - you'll want to oil the bowl before you plop the kneaded dough back in, so that it wont stick when it's rising
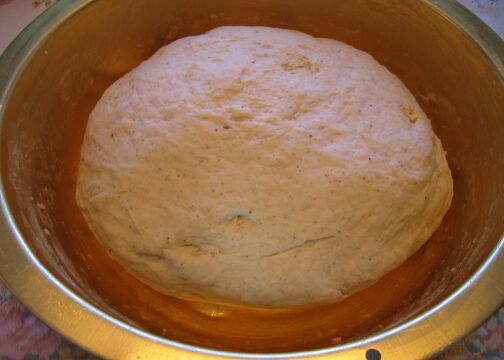
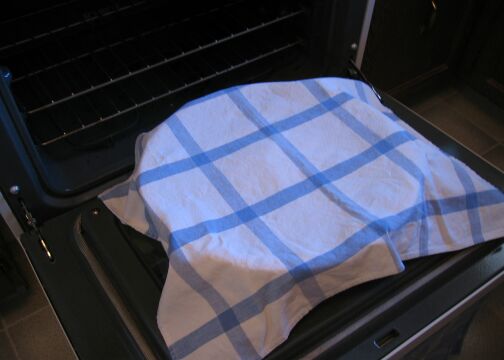
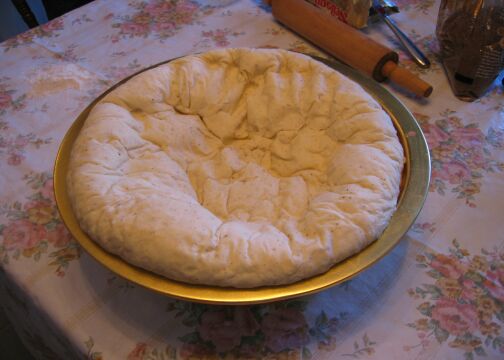
Cover the bowl and put it in a warm place to rise - we usually put it on the open stove door, as you can see above, and then turn the stove on occasionally to warm the area. Leaving the stove on all the time will typically get it too hot, so watch it. You want to leave it rise until it's doubled in bulk - this will take an hour (longer if it isn't warmed enough).
When it's risen, it will look like the dough in the next picture - for a few minutes, since the next thing you want to do is give it a good whack or two on top to deflate it.
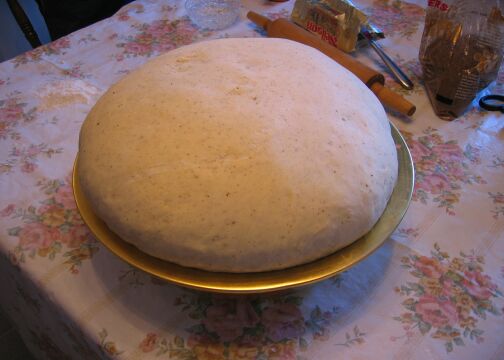
It will then look something like this:
Now you can turn it out on the table again and divide it. Just use a large knife.
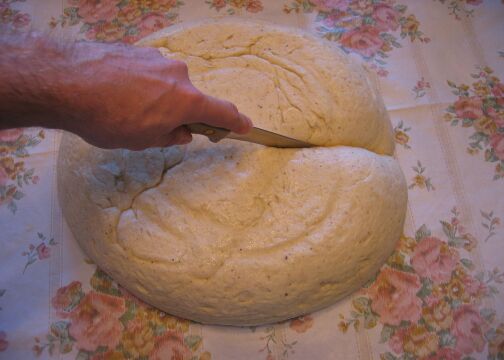
To make the rings, you'll want to divide it into six equal pieces. If you actually want to make loaves of cardamom bread from this, you'll want to divide it into four pieces rather than six.
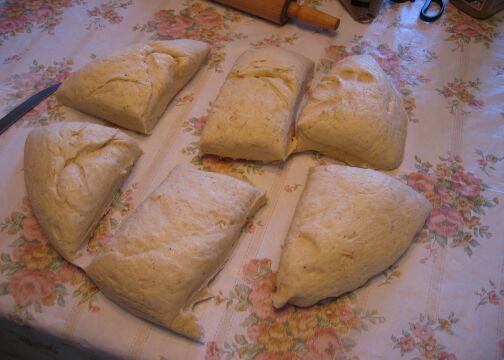
You want the pieces to be roughly the same volume. If you were making this into bread you'd shape these into loaves and put them into greased pans to rise again. We're not though. We're going to roll these into squares - so the easiest ones for you to start with are the two square pieces in the middle. To roll the other sections, it's easiest if you square them off by tucking the pointiest part under before rolling so it becomes roughly rectangular.
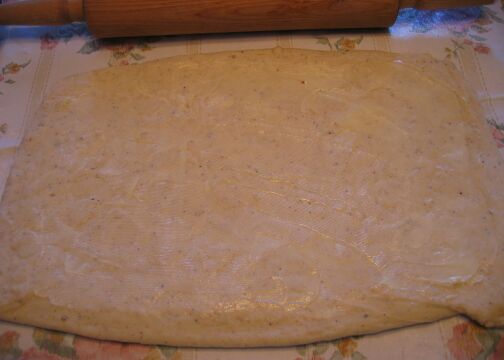
Lightly flour the surface and a rolling pin, and gently roll one of the pieces into a rectangle - you're going to be rolling upwards, so you want the short dimension to be perpendicular to you.
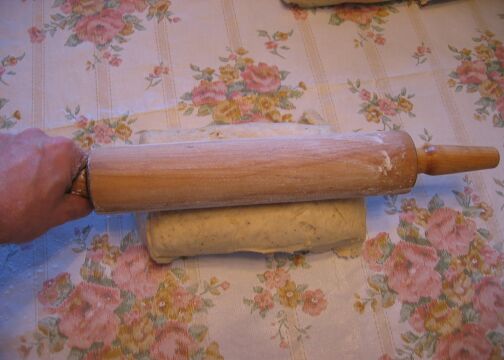
The next picture shows roughly what you want to end up with. You can also adjust the width of it to the size of the pan you'll be using to bake it in - if you've got something smaller, make it narrower. Now that we've got it flattened, we want to get it ready for the filling.

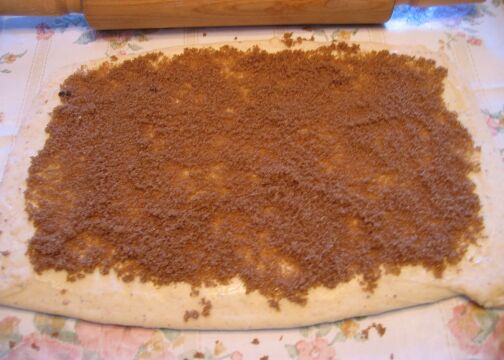
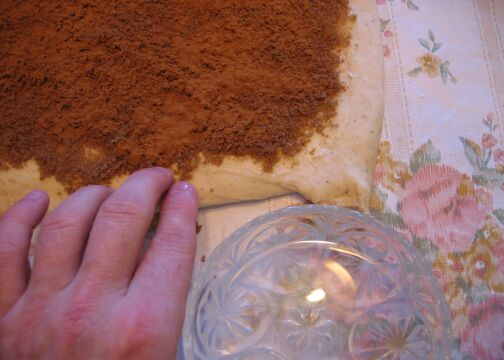
Start by buttering the surface, a little heavier than you'd butter a piece of bread.
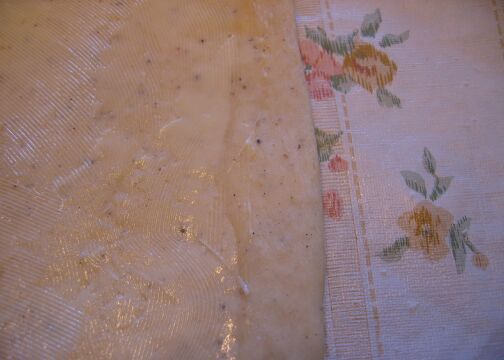
Make sure you leave around a half inch on the edges - that area is where you want to seal the dough, and if you butter the whole thing, it's not going to fasten.
Coat the part you've buttered with brown sugar (again, avoid that outer edge - though you can see in the picture a few little mishaps won't hurt). I haven't put a total amount in the ingredients, because it really depends on your taste. What I've done is put it around an eighth to a quarter of an inch thick, enough so you don't see the dough for the most part. More than that will cause it to run over more in the stove and make a bigger mess of your oven. So be warned.
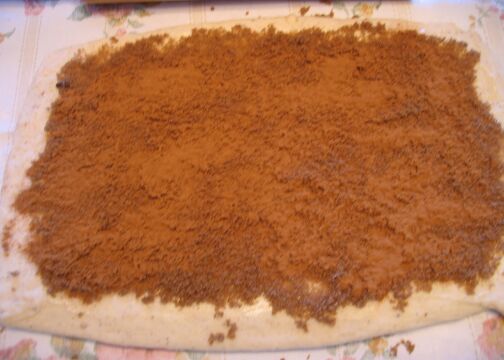
You will next want to coat those same areas with cinnamon, again to your taste. I use lots - a couple of tablespoons for one ring, for sure.
Now you're almost ready for the big adventure of rolling it up. Before starting to roll you will want to do two things - first, very generously oil a pie plate to put the finished ring in. Don't skimp on the oil in the pan, because these will want to stick. If it sticks on the sides, a knife can be run round the bowl, but if it sticks on the bottom, you'll have to be a bit more creative. More on this later.
Our second bit of prep work is wetting the dough so that it will seal once its rolled up. You want to wet the entire outer edge that you kept butter, sugar, and cinnamon-free. Just use your fingers, and keep a bowl of water handy for dipping them in:
Begin rolling with the bottom edge, moving upward:
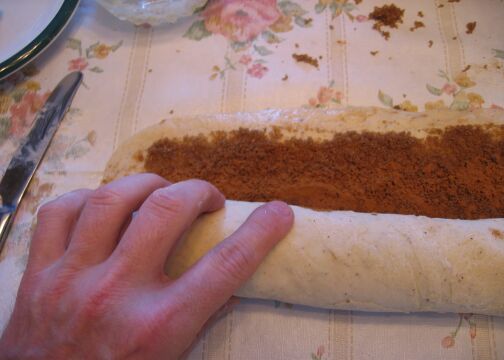
When you get to the top, stretch the top piece over a little and make sure it forms a tight seal:
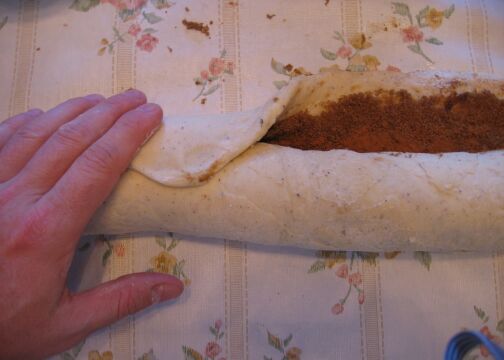
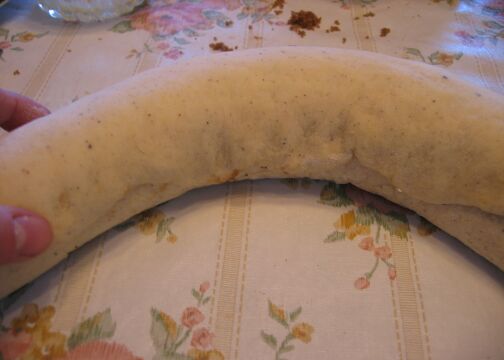
Now you've got a tube, you need to start shaping it into a roll. You want the seam you just formed to be on the inside or the bottom, so turn the roll so it is positioned in such a manner, and then begin to turn the tube into a circle:
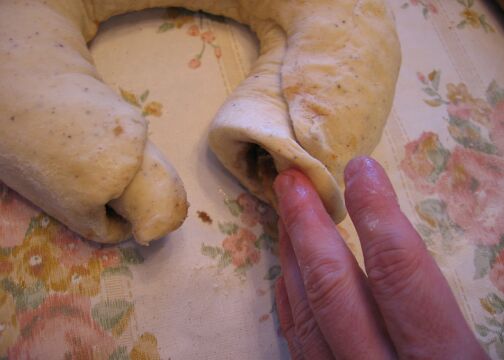
Once you've got this to a reasonable circle, you need to seal off the ends. Have a look at both ends- they won't be even for certain, but one will likely stick out a little more than the other. Take the one that's sticking out more and use it as the outside - you'll be pulling that dough over top of the other end (that is, tucking the other end into this). Wet both of these again on the inside so that they'll form a good seal, and then push the smaller end into the larger one, stretching the dough over the top of the other in much the same way you formed the first seam:
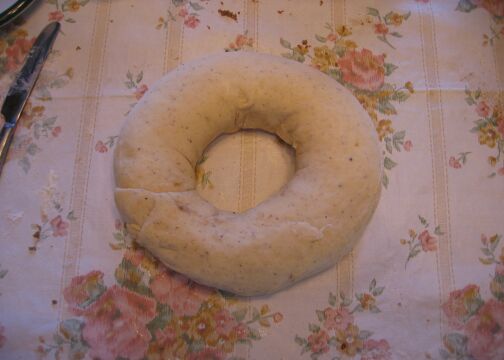
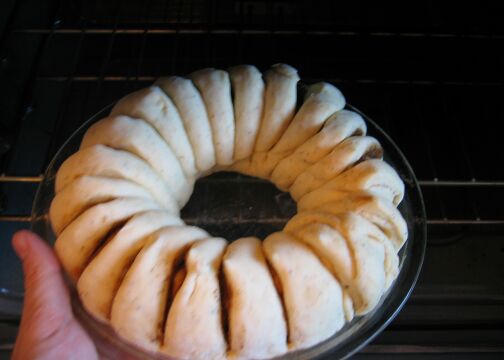
Now lay that in the greased pan, and stretch it out so it fits the edges nicely:
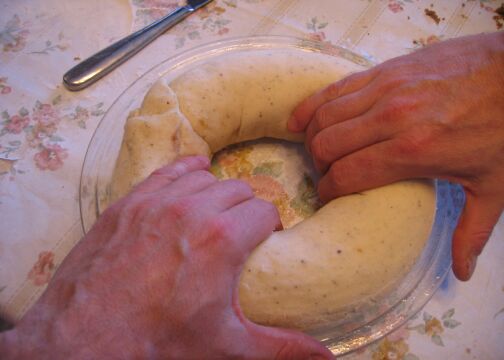
Now the final step. Take a pair of kitchen shears or scissors, and position them so that the points are around 2/3 of the way through the dough, and make a cut:
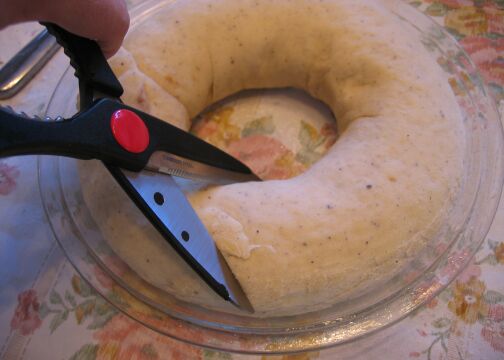
Go around the entire ring doing this, in roughly 3/4 - 1 inch intervals - roughly the size a final slice of this will be:
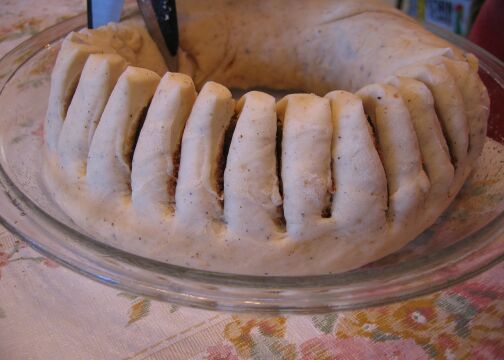
When you're done, you want to take the points that are formed by the scissors at the top of each snip and sort of flatten them out and pull them to one side, so that the dough is rounded and the inside part is exposed a little:
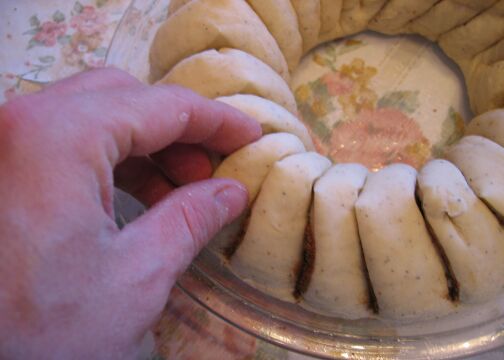
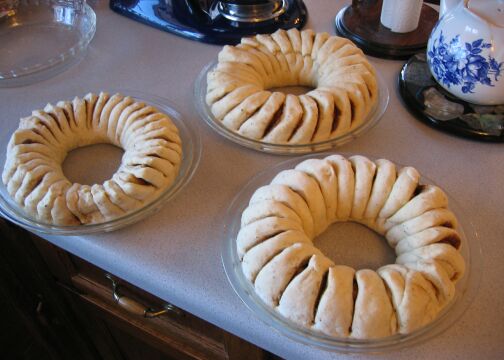
Now this is ready for the oven. You will want to do 3 of these (assuming your oven will fit three). You'll find after you've done the first two that they'll rise a bit by the time you've done the third one, so after you've done the third, wait a few minutes so that one gets a bit of a rise too. You should be able to easily guess which one of the three in the next picture is the one that was just finished.
Preheat the oven to 375f. It's always a good idea to use an oven thermometer to verify your oven's temperature, I've found mine can be off a fair bit.
Once the oven is hot and you are happy with the appearance of your rings, put them in.
At the 375 degree temperature, these should take around 25 minutes to cook.
Watch the last five minutes or so - they should get golden brown. The sugar will be bubbly.

The sugar will very likely spill over the side of the pan at least in a few places. One of those foil liners in the bottom of your oven should make any necessary cleanup a bit easier or put some foil under there that you can just peel up and throw away.
Now, this part is very, very important: when these come out of the oven, they will have boiling sugar around the rims. It is very easy to burn yourself with this, so use some thick potholders to even come close to these (and make sure they're not good ones, since they'll get liquid brown sugar all over them). The boiling sugar will cool into a candy very, very quickly - so it's vitally important to get these out of the pans promptly (or as my grandmother always said, get these suckers out of the pan right away, or they'll be there forever). You'll need a supply of plates handy - one for each ring to sit on, and another to use as a temporary support for the top of the ring as you remove it from the pan. Prepare for doing this before they're ready, because they really will weld to the pans very quickly, and you'll have three ready at once. As you do each, leave the others in the oven so they aren't cooling while you work (leave the oven door open so it's not too hot).
Remove one of the rings from the oven and get it onto a surface like a cutting
board where it can sit for a minute and not burn anything. Then take a plate
and put it on top.
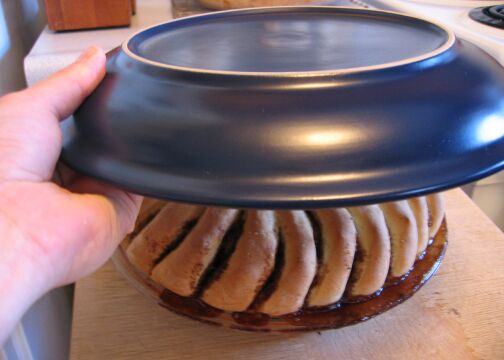
Holding the plate tight to the ring underneath with potholders, invert the whole thing so that the top plate is now the bottom and the pie pan is sitting upside down. Now you want to gently lift the pie pan off the finished ring. This is where glass pie plates help - you can see where they may be sticking and gently slide a knife up to ease it out. Don't just shake the pie plate to loosen it hoping it will fall out - if it's stuck anywhere, it will likely break, and you'll end up with a half ring outside the pan and the other half in. Because this is hot, it is likely easier to have one person actually hold this and lift the inverted pie plate gently while another goes in the edges with a knife to loosen any stuck parts. The person doing the lifting is also more likely to spot the parts that are sticking than the one looking up from the bottom armed with the knife. But if you're coordinated one person can pull it off :P
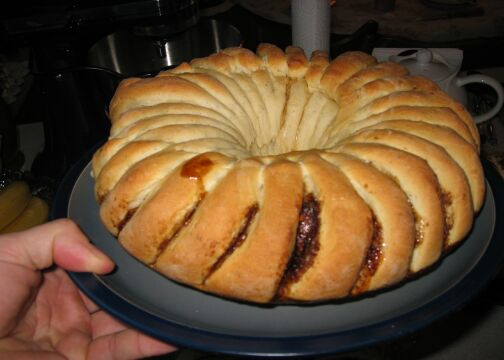
Once you get it loose from the pan, lift the pan off, put a second plate on the bottom of the ring and invert the whole thing again so you have a right-side-up ring. Now you're ready to do this with the other ones in the oven.
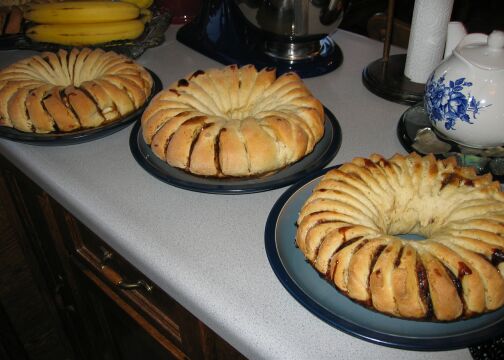
The first three are done! Prepare the next three (you likely did this when the first three were baking, so you can just preheat the oven again and do it with the remaining three.
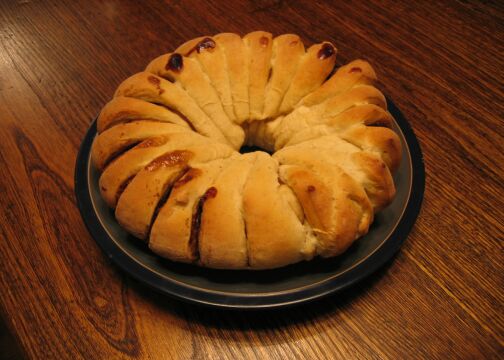
And when they're cool (they need to cool about 40 minutes, or they wont be solid enough to cut and you'll burn yourself on the sugar), you have some wonderful Swedish Bread (OK Swedish Ring, as I've said the Andersons still insist on calling it bread). The blotches of brown sugar on the one above are due to it spending a little more time upside down while being removed from the pan than was good for it (since the hot sugar runs down). i.e., yes, it's me being uncoordinated.
As I've said, this is a big recipe and it makes a lot - but it freezes really well (we usually wrap them in plastic wrap, then in foil, and then toss the wrapped ring in a plastic freezer bag), and people appreciate these as presents too (no, mine are all spoken for).
If you have any further questions on this, by all means email me.