Stereoscopic (3D) Photo Gallery
|
|
This page highlights some examples of stereoscopic (3D) photography done by me on my new Fuji Finepix S3000 digital camera. |
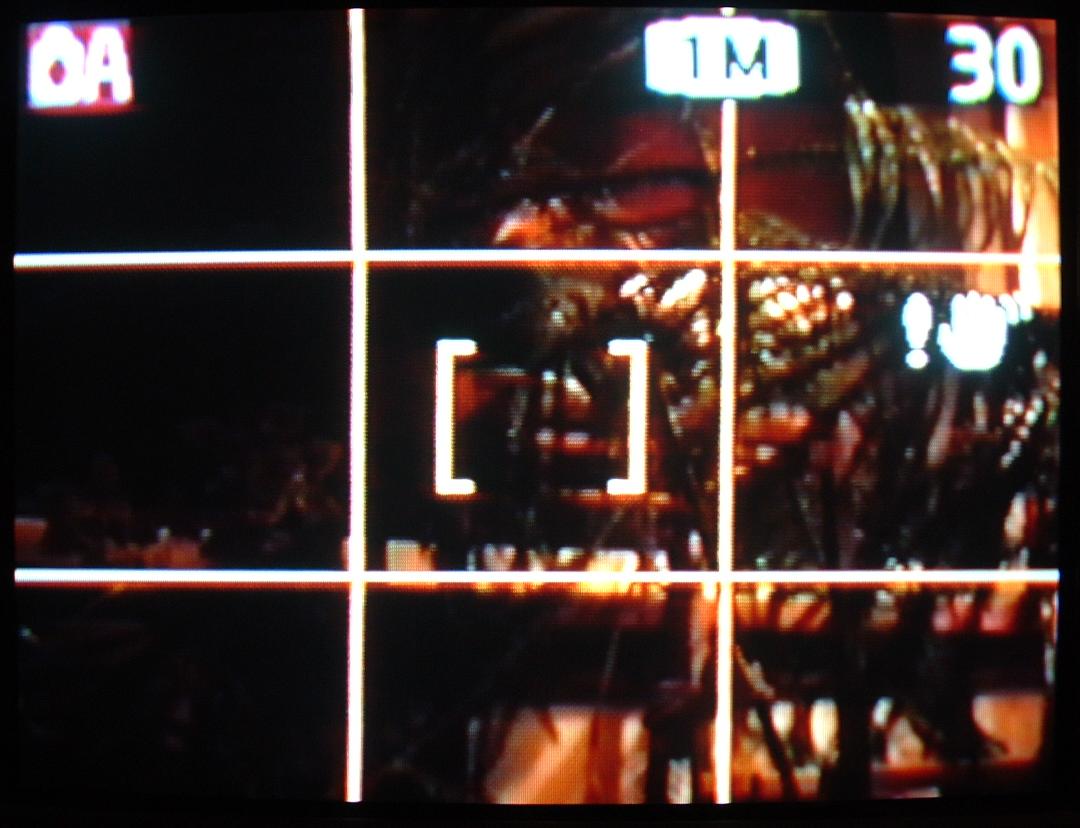
Fuji S3000 Display | The camera has an electronic view-finder, which allows for more careful alignment of subjects. The view-finder (as well as the LCD display) also allows you to superimpose a grid pattern (#) that splits the screen into 3 parts on each axis, in addition to the centre autofocus region marks ([ ]). This helps a lot with alignment and leveling, so that the left- and right-eye images will be less likely to need corrections (such as rotation or position translation). |
|
|
After loading the left- and right-eye images on the computer, some work is required to generate an anaglyph, which is a combined image using separate colours for the two eyes. I use The GIMP to do most of my image editing. At first, I used a mostly manual procedure, to produce the anaglyphs. I then found a stereoscopic plug-in for The GIMP, which does most of the work of generating either stereopairs (crossed/parallel/mirror) or anaglyphs (color/b&w). |
|
|
Click on the images below to view in 3D! (Requires Java Applet support.) If the Stereoscope Applet doesn't work for you, you can always click on the
links below each image area, to select either the
JPS (Stereo JPEG) File,
the
colour anaglyph
( |
|
|
You'll need a pair of red-blue or red-cyan 3D glasses, with the red filter on the left eye, for viewing the anaglyphs. |
|
|
My very first stereoscopic photo! This turned out much better than I expected, and even better than some of my later attempts (where I put more effort into it). Beginner's luck, I guess... The alignment worked out really well for this one. I didn't have to crop the photos, or do anything to correct misalignment between the left- and right-eye views. (I did generate a second stereogram from the same original photos, where I attempted to fine-tune the alignment focussing on the mug, but 3D effect was a bit better in the undoctored one shown here.) Still, I did break at least 3 rules of stereo photography... |
|
|
A corrected version of the above. The first problem was that some horizontal lines that should have been straight and level were neither. This was in part due to lens distortion, and in part due to the way I aimed the camera toward the target, rather than taking two completely parallel shots. (One of the recommendations for closeup shots is to avoid "toe-in," which can cause keystoning, or "convergence error.") A wideangle plug-in for The GIMP proved useful to correct image curvature, introduced by the camera's lens (which was zoomed out all the way). Then, using The GIMP's rotation and perspective transformation tools, I managed to eliminate keystoning and get nice horizontal lines. Also, by focussing on the mug in the original, I did break another rule: No part of the spatial image may be cut by the stereo window. It's sometimes cool to have things jump out of the window, but those parts of the image have to be completely contained within the border. (See below.) Since the countertop extends out in front of the mug, but is cut off at the edges, both should be entirely behind the stereo window. (By adjusting the left/right alignment to have the front edge of the counter as the focus, it was easy to correct for this.) |
|
|
My second subject. I figured the shapes of the cup and sugar bowl would make for a nice 3D effect, and I used the glass coffee table as a surface in hopes the objects on it would appear to be floating. I shot the two views without a tripod (as with the first one, above), and there was a rather significant misalignment between the two views, but that was easily corrected. One thing I discovered in viewing the colour anaglyph of this is that high contrast in colour or light level between adjacent objects (or between foreground and background) can be a problem, because you get more "ghosting" - shadows from one eye's image to the other. I'm not sure how much of that is due to the fact that I don't have a quality pair of 3D glasses, and how much is due to incorrect colour balance. |
|
|
Another stereogram generated from the same original photos as the previous one. I exagerated the left/right image separation, to make the objects appear to "jump out" of the screen more than in the previous shot. I also wanted to use an exagerated separation for the purpose of the following shot (since the screen image would end up looking smaller). |
|
|
The idea with this one was to produce an anaglyph within an anaglyph. The anaglyph of the previous shot was displayed, full-screen, on my monitor, and I then took left- and right-eye shots of the monitor, which were then used to generate the resulting stereogram. Unfortunately, there seems to be even more ghosting than before when viewing the image on the monitor. The cyan, in particular, shows through the red filter a lot. (Perhaps it came out too light on the screen, or in the captured photos.) A better effect could be obtained by displaying separate left- and right-eye images on the screen for each of the corresponding shots of the monitor. Alternatively, I could doctor the whole thing by knocking out the screen image, and pasting in a reduced-size version of the previous anaglyph. But, that would be cheating... At least I thought I had an original idea in this composition, until I saw one called "Flying Through Time" by Dennis Green, in the PSA Digital Section of the CSC 6th Annual 2004 Exhibition results. |
|
|
OK, this one also has an exagerated left/right separation, but in this case it's natural, because I took the pictures from only a foot away. To get a realistic 3D effect, you'll have to put your face that close to the monitor, have the image sized so that the distance between the two bottom crop marks is 7 inches, and be looking at the middle of the image dead-on. I shot this with the camera pointing down at a 45 degree angle, which is a steeper angle than I'd normally use, but the goal was to have a couple images to use for the following... |
|
|
My first attempt at producing a
phantogram
(technically, a
stereoscopic anamorphosis).
The idea is to use a perspective transformation on each of the
left- and right-eye images, then crop and resize the resulting images
to get back the original size and proportions of the flat surface beneath
the object being shot.
The resulting stereogram should then be laid flat and viewed from the same
angle (45 degrees) and distance (one foot) as the camera that shot the
original views.
(This is called the
"sweet spot.")
You should notice a remarkably vivid 3D effect, with the object seeming
to come right out of the image surface.
If you're viewing this on the screen, it will be hard to reproduce the right conditions. However, if you're using a laptop computer or LCD monitor, you could try lying it flat. The image should be as close as possible to the size of a sheet of letter paper (8.5 x 11 inches); the crop marks define a 7 x 9 inch region. This is not too bad for a first attempt (since these are very tricky), but the object was a bit too large to fit nicely within the target area (when viewed from either eye), and I had the camera too close to the target (which resulted in the bottom corners being cut off on one side or the other). To do this right, I'd really need to follow a more accurate procedure. |
|
|
OK, this is the last one I'll do involving mugs as subjects, but I wanted to try doing something on a larger scale. This shot was taken to be used for another phantogram, but to be reduced to half size. So, I also used a hyper-stereo technique, to exagerate the perspective, using twice the normal base (eye spacing). The image was shot from about 40 inches away. To get the best 3D effect, you should be about 20 inches from the monitor, have the image sized so that the width is about 11 inches, and be looking at the middle of the image dead-on. |
|
|
My second
phantogram,
using a
hyper-stereo
photo technique, with twice the normal eye spacing.
The resulting stereogram should then be laid flat and viewed from the same
angle (45 degrees), but half the distance (20 rather than 40 inches),
as the camera that shot the original views.
If you're viewing this on the screen, it will be hard to reproduce the right conditions. However, if you're using a laptop computer or LCD monitor, you could try lying it flat. The image should be as close as possible to the size of a sheet of letter paper (8.5 x 11 inches). |
|
|
OK, I lied! Here's one more involving a mug. I wanted to try a more interesting surface, which would also provide a natural pattern for perspective correction, sizing and alignment. Once again, the anaglyph suffers from some ghosting, due to the contrast between dark and light squares, as well as the contrast between the light writing on the dark mug. On the other hand, the wood grains of the board and hardwood floors (with their "busy" texture and richness of brown colours) seem to work well to minimize ghosting effects. (I'm not the first to notice this.) |
|
| Another phantogram, based on the above shot. This one should be viewed (laid flat) at the usual angle (45 degrees), at a distance of about 30 inches. The image width should be about 12 inches. |
|
|
OK, onto another subject! I used the same surface for this, as for the mug. Once again, the anaglyph suffers from some ghosting, due to the contrast between dark and light squares, but the rest turned out not too bad. Can you spot my error on this one?... Another recommendation for closeup shots is to not use the camera's built-in flash when using a single camera to shoot the two views. The problem is that the shadows move as the flash moves, resulting in an inconsistency. Indirect lighting or fixed direct lighting should be used to eliminate this problem. |
|
|
Another phantogram, based on the above shot. This one should be viewed (laid flat) at the usual angle (45 degrees), at a distance of about 30 inches. The image width should be about 12 inches. If you enjoyed these early attempts at phantogram production, you might also want to check out my collection of Two-Bit Phantograms, which are miniatures meant to be viewed as 4x6 (A6) prints. |
|
|
My first outdoor stereo photo! This is a view looking due south down my street on a hazy December 5th, just after noon. I had hoped to repeat this shot right at noon on or near the winter solstice, but time constraints and/or weather conditions have so far prevented this. This was shot in colour, and even the anaglyph is a full-colour version, though it may look like black and white due to the lighting. Attempting this one gave me a further appreciation for the rules of stereo photography... Framing this was tricky. I didn't use a tripod, so had to correct the rotation to get the horizon to line up between left and right images. Picking a foreground focal point to establish the stereo window was hard, since there wasn't a lot of distinctive shapes common to both images in the nearest foreground. Also, traffic on the avenue at the end of the street heavy enough that I ended up with cars in different positions between left- and right-eye shots, resulting in retinal rivalry. Since the eyes are drawn to the horizon, where this discrepancy occurs, it's pretty hard to ignore it. |
|
|
My first outdoor hyper-stereo photo... This is the same view as above, taken at around the same time. The difference is that this one uses a hyper-stereo base (left/right eye spacing) of about 30 inches, or 10 times the normal. This exagerates the illusion of depth, but also makes things look strangely miniaturized, as if you were a giant looking down the street at eye-level. This shot posed the same challenges as the previous one, including retinal rivalry at the horizon. Also, the drastic base may make it difficult to get the images to converge properly. |
|
|
My nephew Stefan... This stereogram was made starting with a single (2D) photo, taken by Stefan's mom, Karen. The shot was just too cute, and the perspective too good to pass up, so I took up the challenge of making a stereogram out of it. It turned out to be easier than I expected, and the result was not bad. I used another of The GIMP's transform tools: Shearing. By taking two copies of the original photo, and shearing one toward the left and the other toward the right, lining up the grid pattern to Stefan's left and right sides, respectively, I was able to get a reasonable approximation of left and right eye views. Due to the rather extreme camera angle, the shearing needed was rather large, and the shape distortion is noticeable on the separate left and right views. However, when blended into a stereo view, it's less obvious. The image might be improved by editing out the other elements, especially the floor, since they can interfere with the stereo illusion. (Fortunately, the floor's pattern is not "loud" enough to be too distracting. However, it does appear to be sloped, rather than flat. This is more apparent in the stereo views than in the anaglyph.) |
|
|
My nephew Stefan having a drink... Another stereogram made from a single (2D) photo. Although less shearing was needed this time, due to a slightly shallower camera angle, the stereo effect isn't quite as good. The shearing (as well as the angle of the shot) creates the illusion of vertical (top to bottom) depth, but does nothing to help with front-to-back depth perception. It's rather like looking at a cardboard cutout of Stefan, from a sharp angle, instead of a real, live, 3D Stefan. The cup should appear closer to the viewer than the top of Stefan's head does, but the opposite seems to be the case. (Again, this is more apparent in the stereo views than in the anaglyph.) Editing out background elements wouldn't help in this case, either. It might be possible, with some more elaborate transformations, to get a better effect. |

Viewing a Phantogram |
Watch this space for exciting new 3D photos... Many of which will have nothing to do with stuff found in my cupboards! In addition to trying some more phantograms, I'll also be doing some more serious outdoor photography, including hyper-stereo shots of distant objects. (I might also try hypo-stereo, macro-photography.) If you enjoyed the phantograms on this page, you might also want to check out my collection of Two-Bit Phantograms, which are miniatures meant to be viewed as 4x6 (A6) prints. |
 |
This work is licensed under a Creative Commons License. Some patents may apply to the process of making phantograms for commercial purposes. |