|
I get a lot of interesting reactions when I show people my collection of phantograms (technically, stereoscopic anamorphoses, a special kind of stereoscopic, or 3D, colour anaglyph). From some people, I get a polite "Oh yeah, I see..." From others, I get "That is so cool!", often followed by "How did you do that?" So, for those who are interested in the process, I've prepared a quick, illustrated summary of how I made them. For those of you interested in trying this yourself (good for you!), I strongly recommend you also read these much more detailed and exact notes on the process of making phantograms. |
||
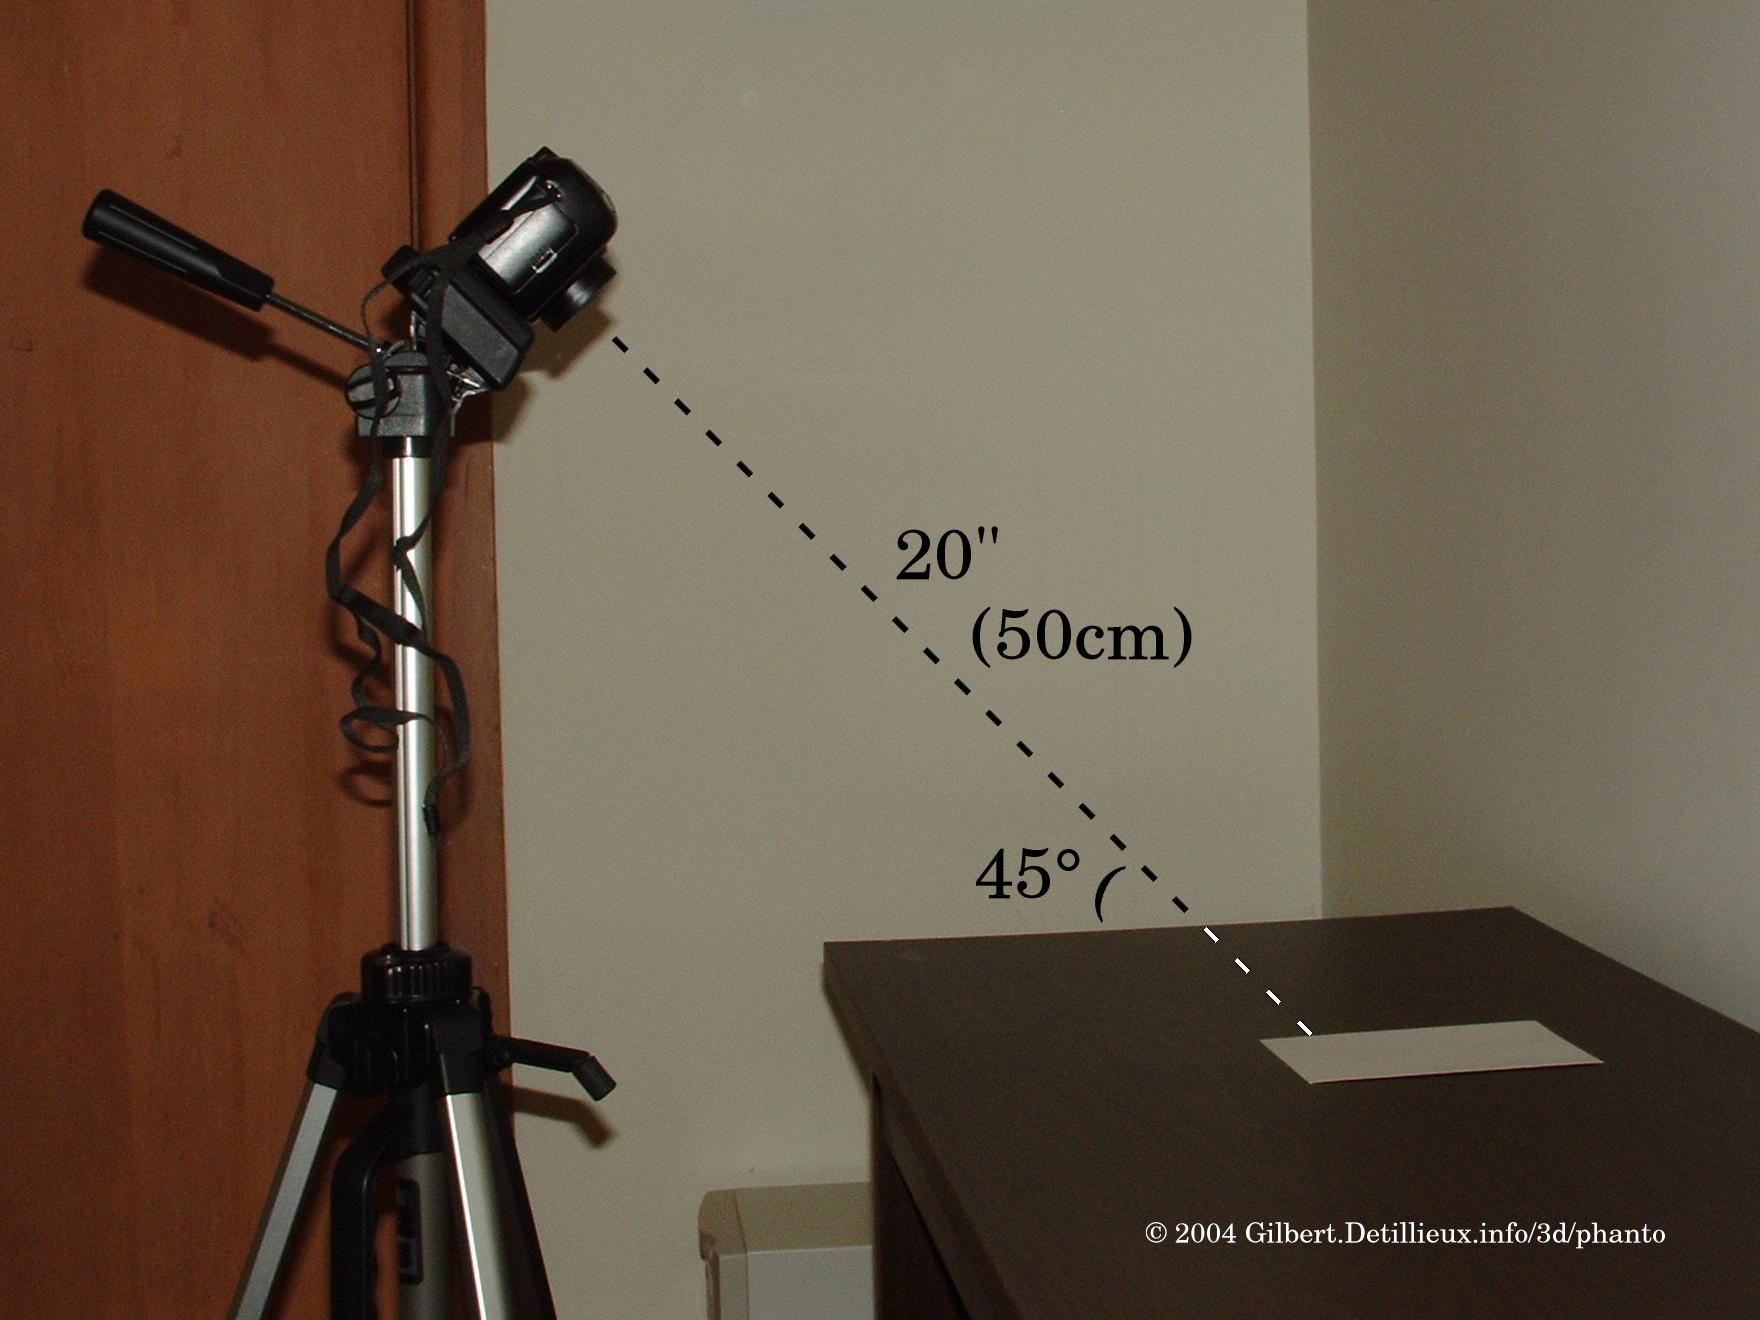 Tripod setup |
Tripod and scene setup: The most time-consuming part of the job is getting everything set up to take the photos that will be used in making the phantograms. But careful setup is critical, as it can make or break the result. You'll need a tripod. (Holding the camera steady at the right spot is too hard.) Decide on where you want the camera positioned relative to the target. (This is the so-called "sweet spot," which will be the optimum spot for viewing the final phantogram.) I use a 45 degree angle, and a distance of 20 inches (50 cm). You probably don't want to get any closer than that, since it may be hard to keep everything in focus, and you'll have an extreme parallax shift between the left- and right-eye views, that may make it difficult for viewers to get the images to converge properly. A larger distance is OK, but don't make it larger than what will be comfortable for viewers. Angle is a more subjective thing, and depends on what you're shooting. A 45 degree angle is a good guideline, but a steeper angle might be better for looking "inside" an object, though you'll not get as good a sense of height. (At too steep an angle, you're not getting the anamorphosis effect at all.) A shallower angle might be more appropriate for viewing larger prints, but too shallow an angle makes it hard to shoot tall objects. |
|
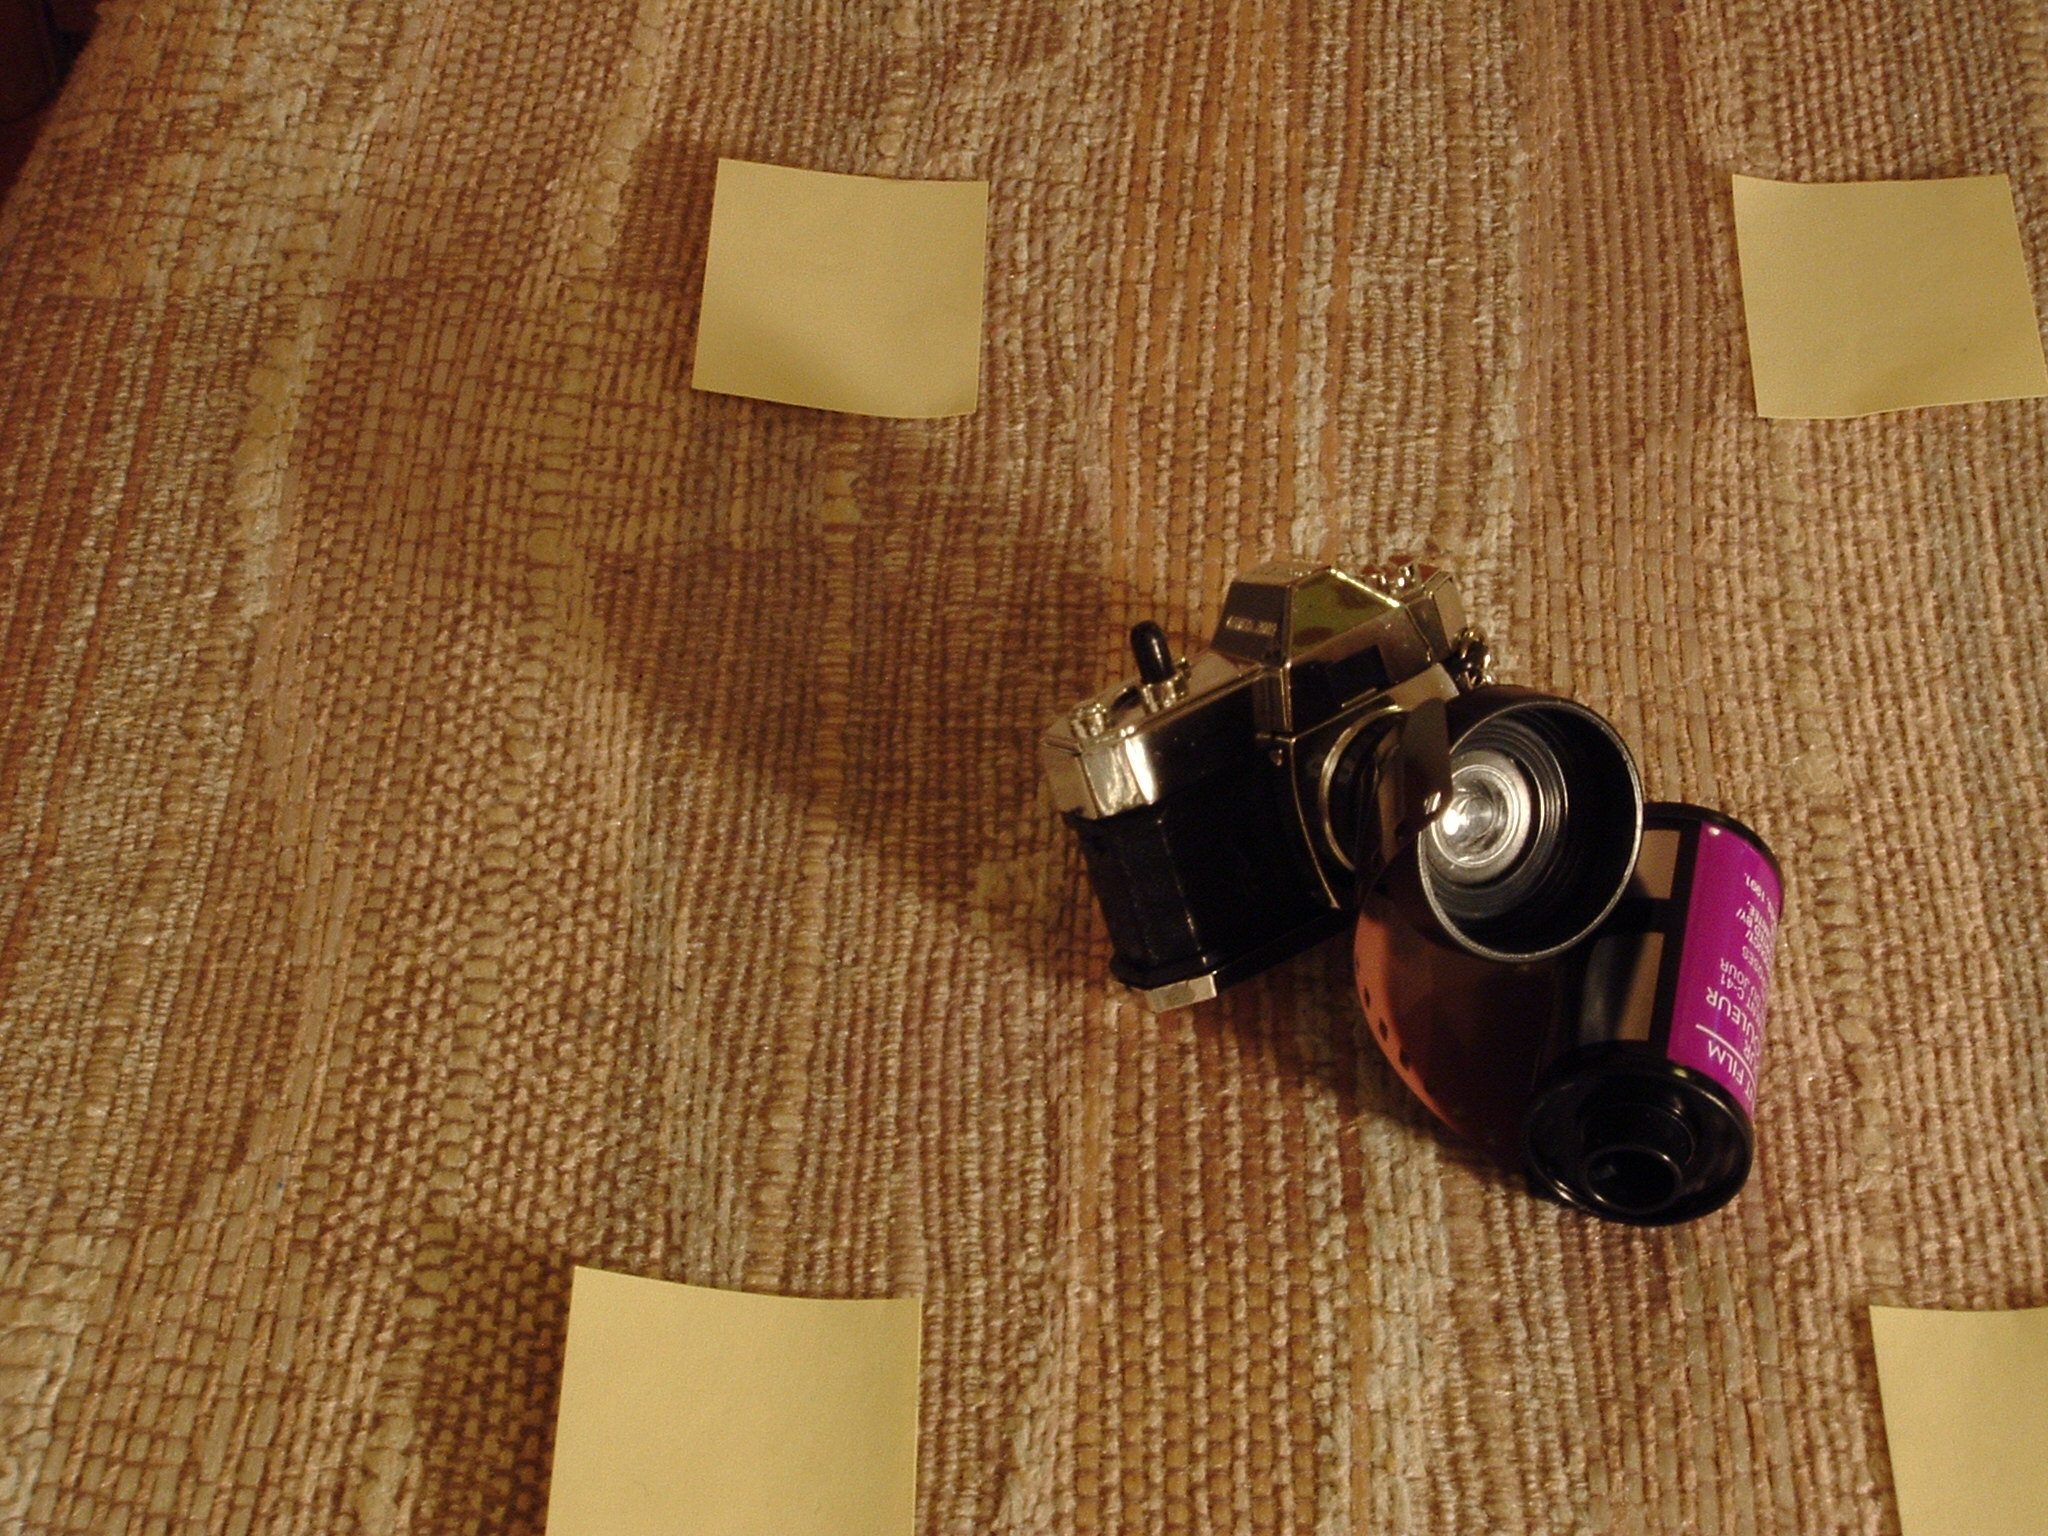 Target frame (textured surface) |
Target frame setup: You'll need a flat surface, such as a table, on which you'll place the objects to be photographed. You'll also need a target frame. This serves as both the background surface on which the objects will be placed, and an alignment guide for object placement and image processing (shown below). For my 4x6 (A6) sized phantograms, a simple print of that size does the job quite well, as long as the print sits flat (doesn't curl up in the middle or at the edges, and doesn't detract from what will be shot. Avoid backgrounds that are too "busy" or that will make the objects above them less clear. Alternatively, you could simply mark off the corners with something that will be quite visible in the photos, such as sticky notes, or use a carboard frame with a cutout of the appropriate size. This makes it easier to use just about any kind of surface that's interesting. Textured surfaces (such as cloth) can add a nice effect, but you'll want to avoid something that's too rough or irregular, as it will make measurement more difficult, or may not produce a nice effect. |
|
 Centre alignment |
Camera setup: You'll need a digital camera that has a manual (or program) mode, so you can set things like aperture priority. Set the camera to use the smallest aperture (largest F-stop) that is practical, to give you a larger depth of field (and keep everything in clear focus). This means you might have to compensate by using brighter lighting, or the camera will have to compensate with a longer exposure time. (This is one reason why the tripod is important. If you're concerned of blurring due to camera shake when pressing the shutter, even on the tripod, you could use the camera's timer mode.) Avoid using the camera's built-in flash. This will create inconsistent shadows between left- and right-eye shots, which might ruin the 3D effect. If you have a hot-shoe flash mount, and a cable that lets the flash be used from a distance, that will work quite well. Otherwise, use natural lighting or fixed external light sources. (I used the flash on the following demo shots, just to keep things simple.) If your camera has an optical zoom mode (ignore digital zoom), you should probably zoom in a little, to eliminate wide-angle lens distortion, to keep lines as straight as possible. But don't get in too tight; you want to make sure that no part of the target frame is cut off. |
|
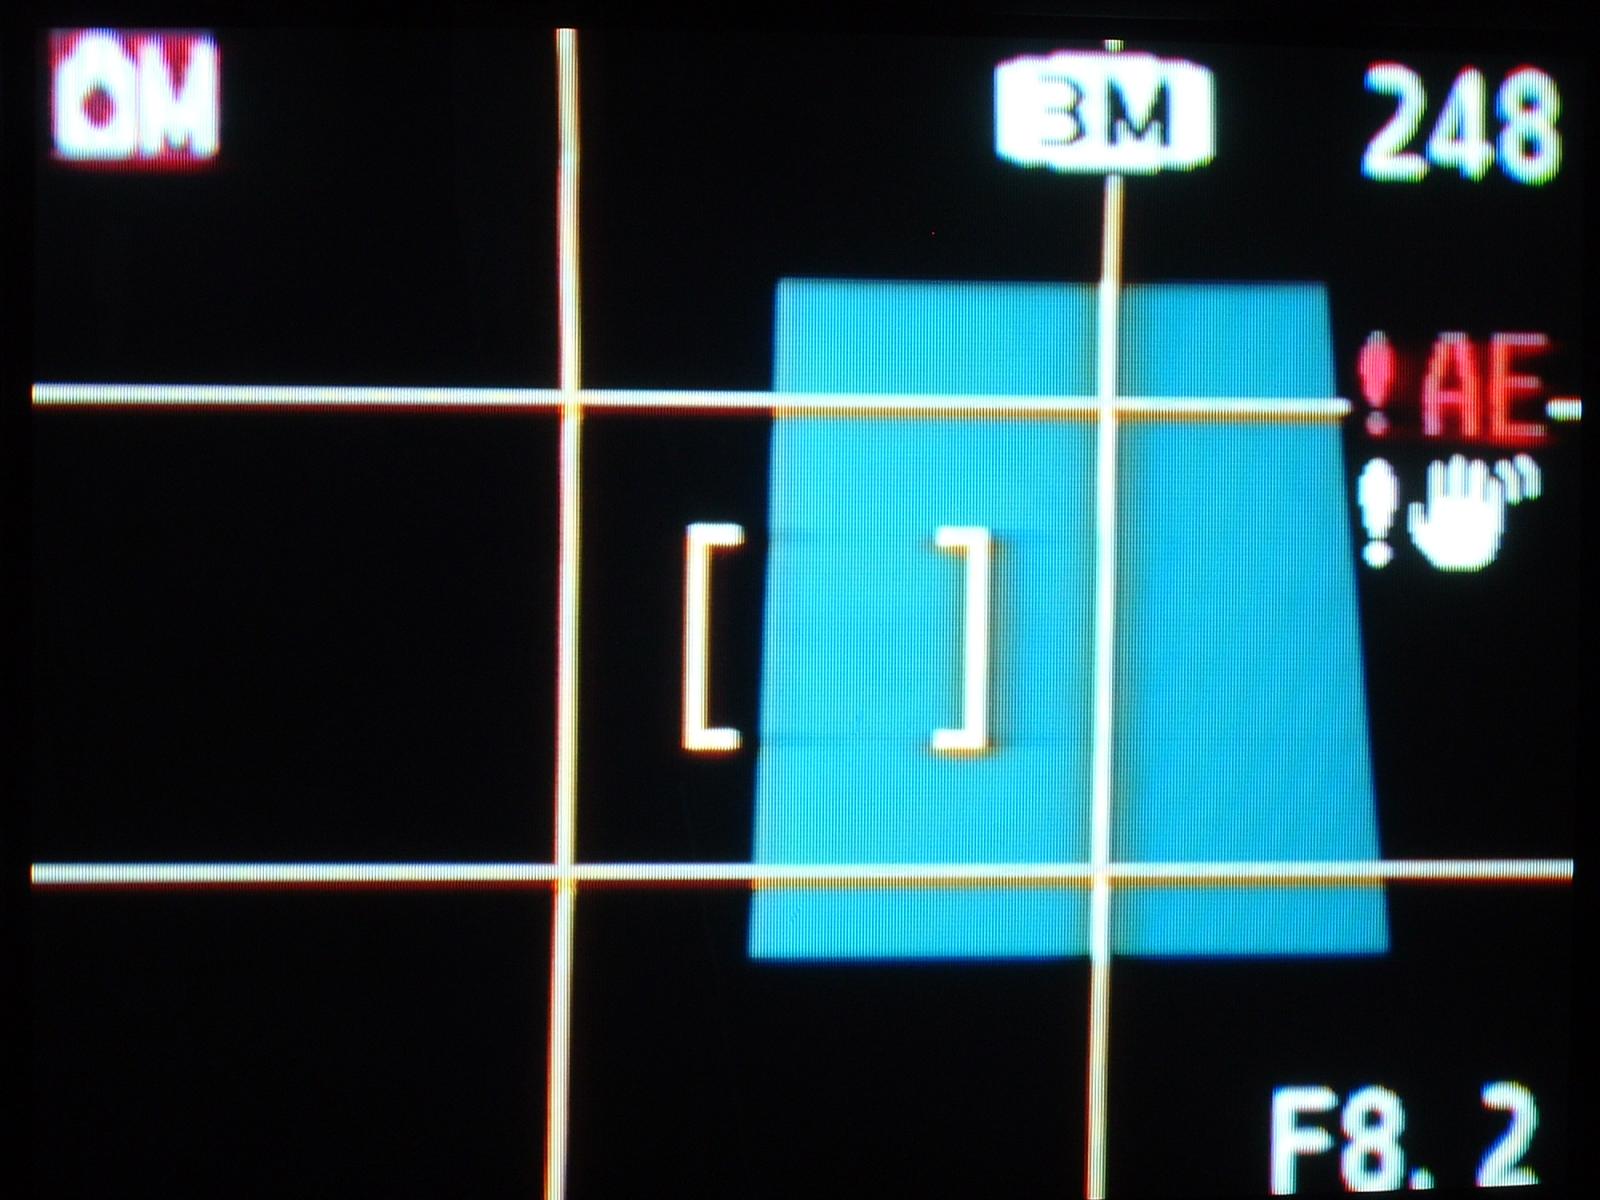 Left eye alignment 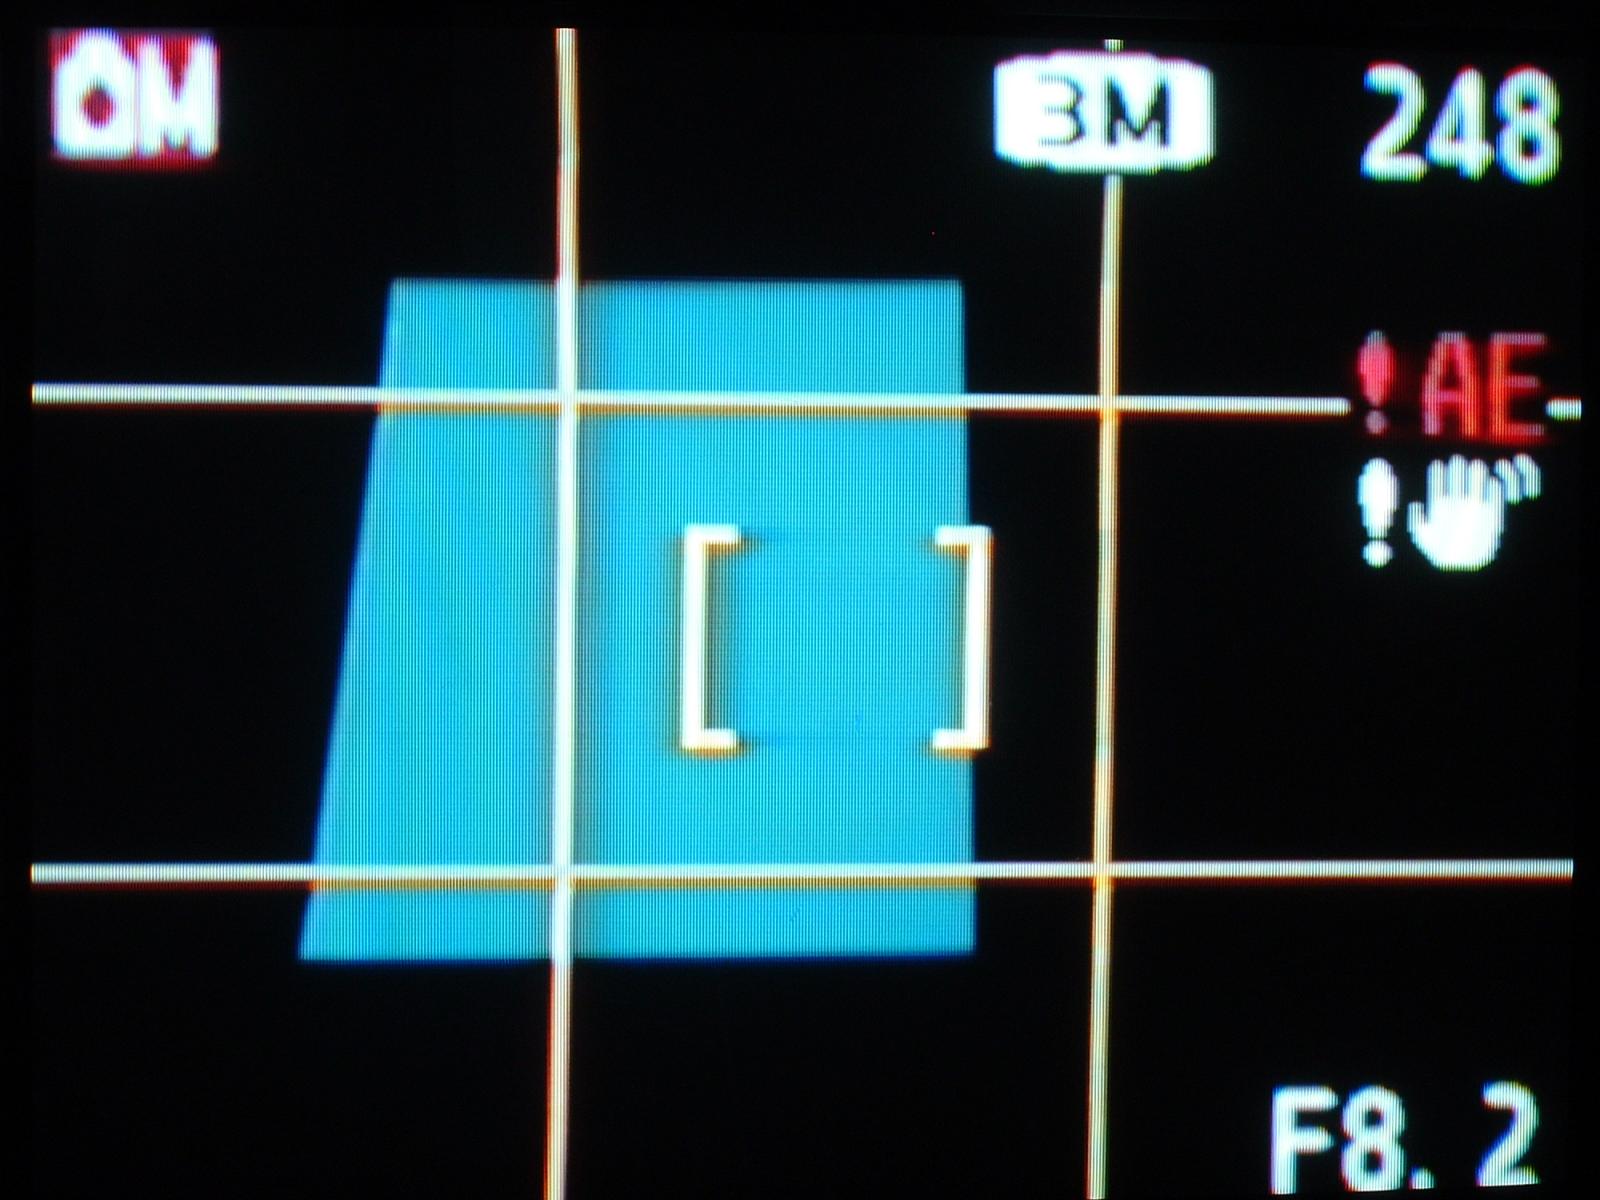 Right eye alignment |
Aligning the left- and right-eye shots: Camera alignment is critical. If you don't have an SLR camera, you'll want to use the LCD display, and not the optical viewfinder, to get a precise alignment. Start by aligning with the horizontal centre of the target frame, so that an imaginary line down the middle of the display would also run down the middle of the frame. The top and bottom of the frame should be as horizontal as possible. Vertical alignment is a little less critical, but you'll want to focus on the objects being shot. This will usually be somewhere in the front (bottom) part of the frame. To get the left- and right-eye views, you then have to slide the camera horizontally (keeping vertical alignment as consistent as possible) to the left and right. The base (left/right eye spacing) should be 2.5 to 3 inches (63 to 76 mm), which is the typical spacing of our eyes. Use of a slide bar is recommended, though I've gotten good results by sliding the entire tripod over. You'll want to put something slipperly (like plastic bags) over the feet, to make it easier to slide, and have two feet at the front, lined up horizontally with the target, and braced against something that will keep them aligned (such as a broom stick braced against the table legs). Moving the target frame (rather than the camera) is not recommended, unless you can ensure that no objects move relative to the frame, the frame does not move vertically at all, and lighting sources are difuse or far enough away that shadows will not shift. |
|
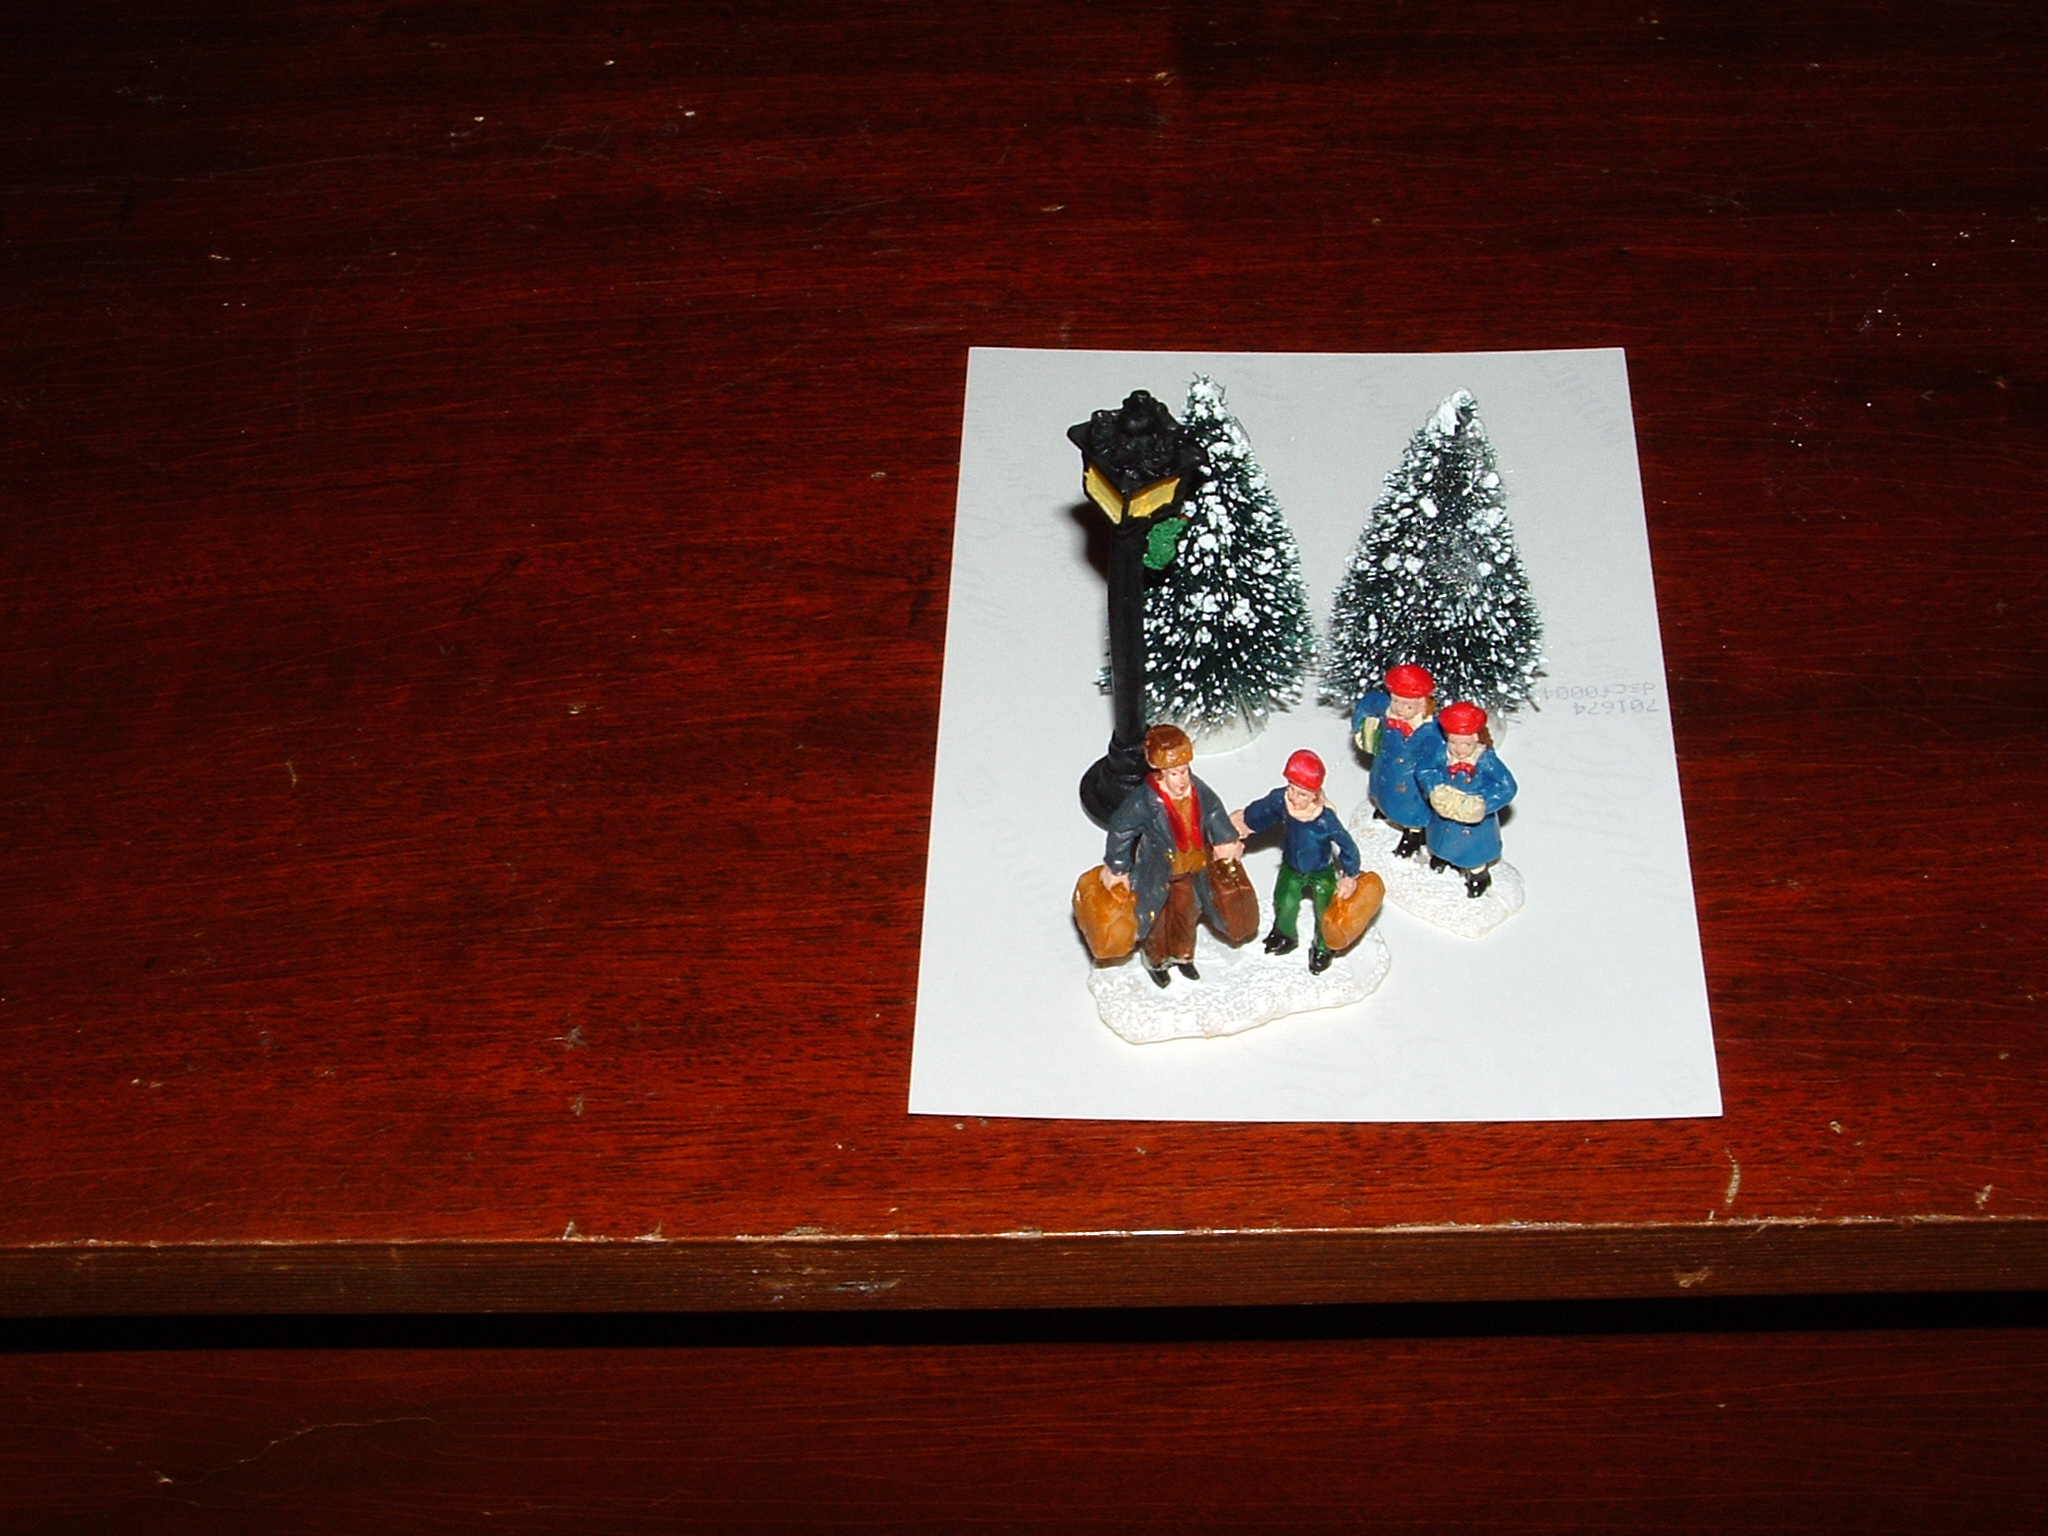
 Bad placement 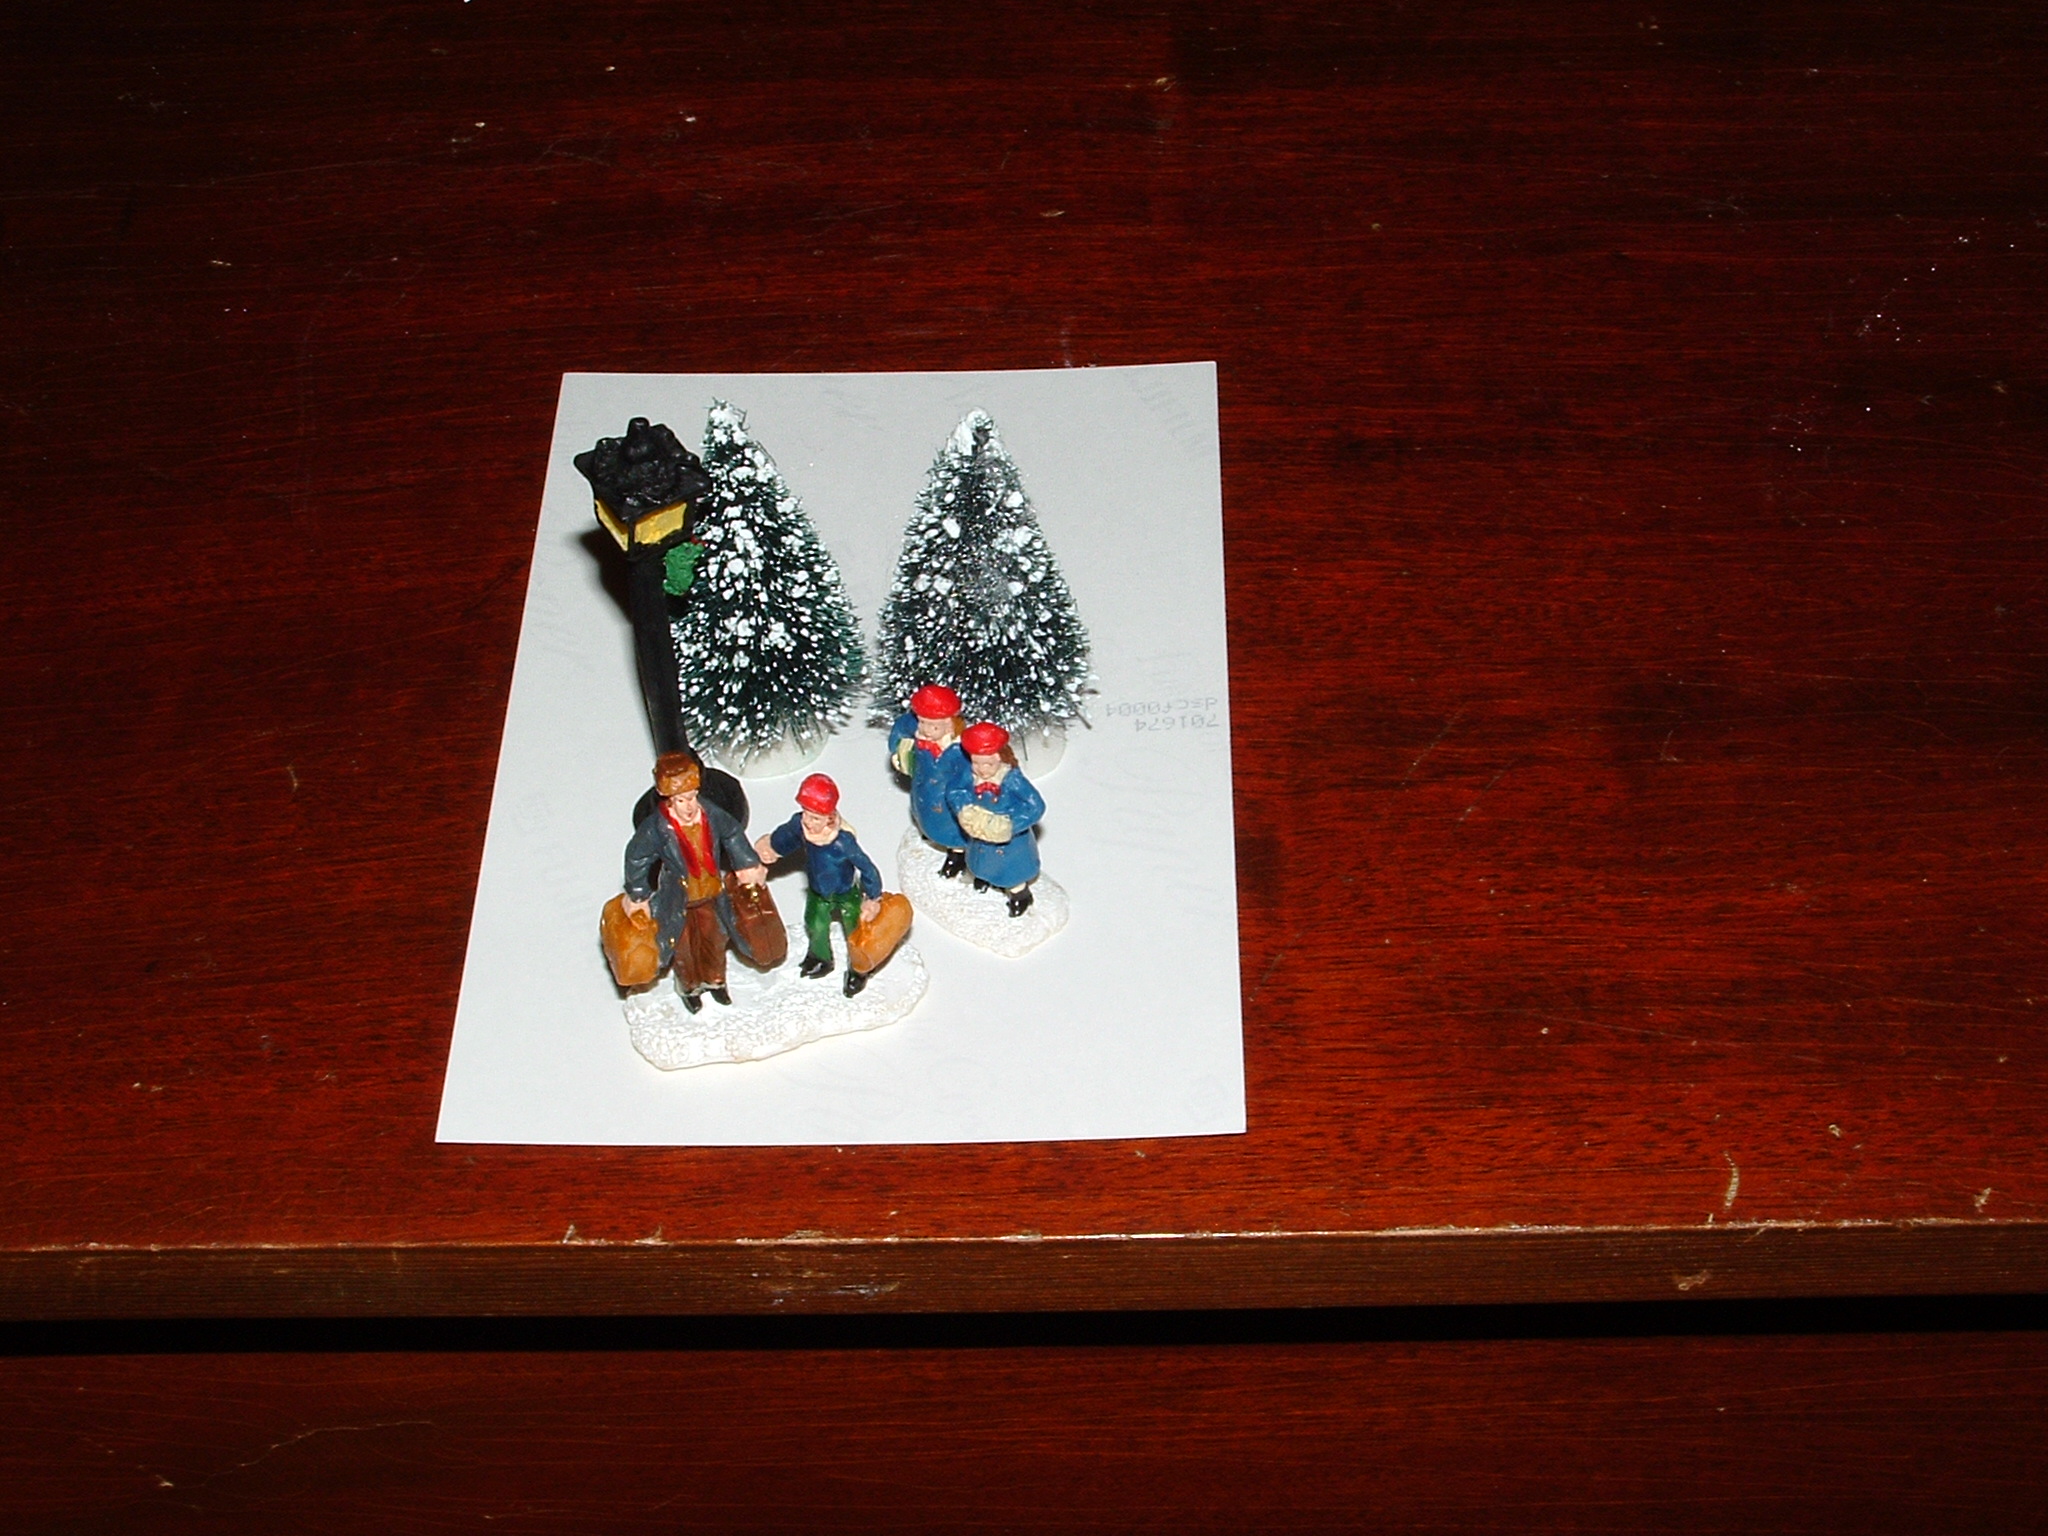 Good placement |
Object placement: Now comes the fun part! Decide what you want to shoot, and place it on the target frame. The critical thing here is that whatever is being shot has to appear entirely within the target frame, for both the left- and right-eye shots. Since we'll be cropping at the edges of the frame, anything sticking out will be cut off, ruining the effect. It's best to leave a small "guard" area around the edge of the frame too, to give you some flexibility in cropping. (Note also that when you get prints made elsewhere, instead of printing them yourself, you might end up with a bit cut off on some or all edges of the print.) The key to object placement is that the taller the object, the closer to the front and centre of the frame it has to be. This might be a problem, if the taller object overwhelms smaller objects behind, so you may have to go for a simpler composition with fewer objects. Of course, as long as they're within the frame, you can put taller objects behind smaller ones. (As I did here.) |
|
 Left eye view |
Right eye view |
Taking the pictures: Now, you're ready to actually take the pictures. You'll want to use the highest resolution available on your camera, since the image processing we'll do is rather extreme, and can result in the loss of detail. Also, since the results are meant for printing, rather than just on-screen display, resolution needs to be high. Once the photos have been taken, we're ready to load them onto the computer for the final processing. |
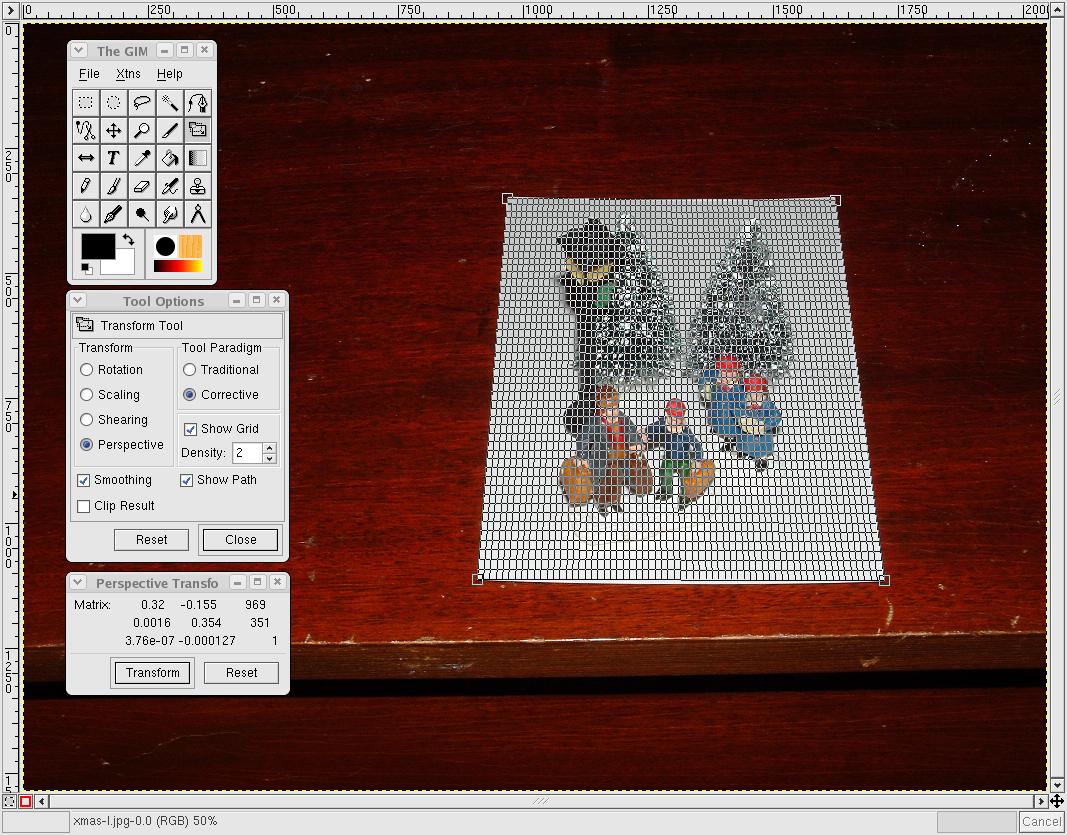 Perspective transformation |
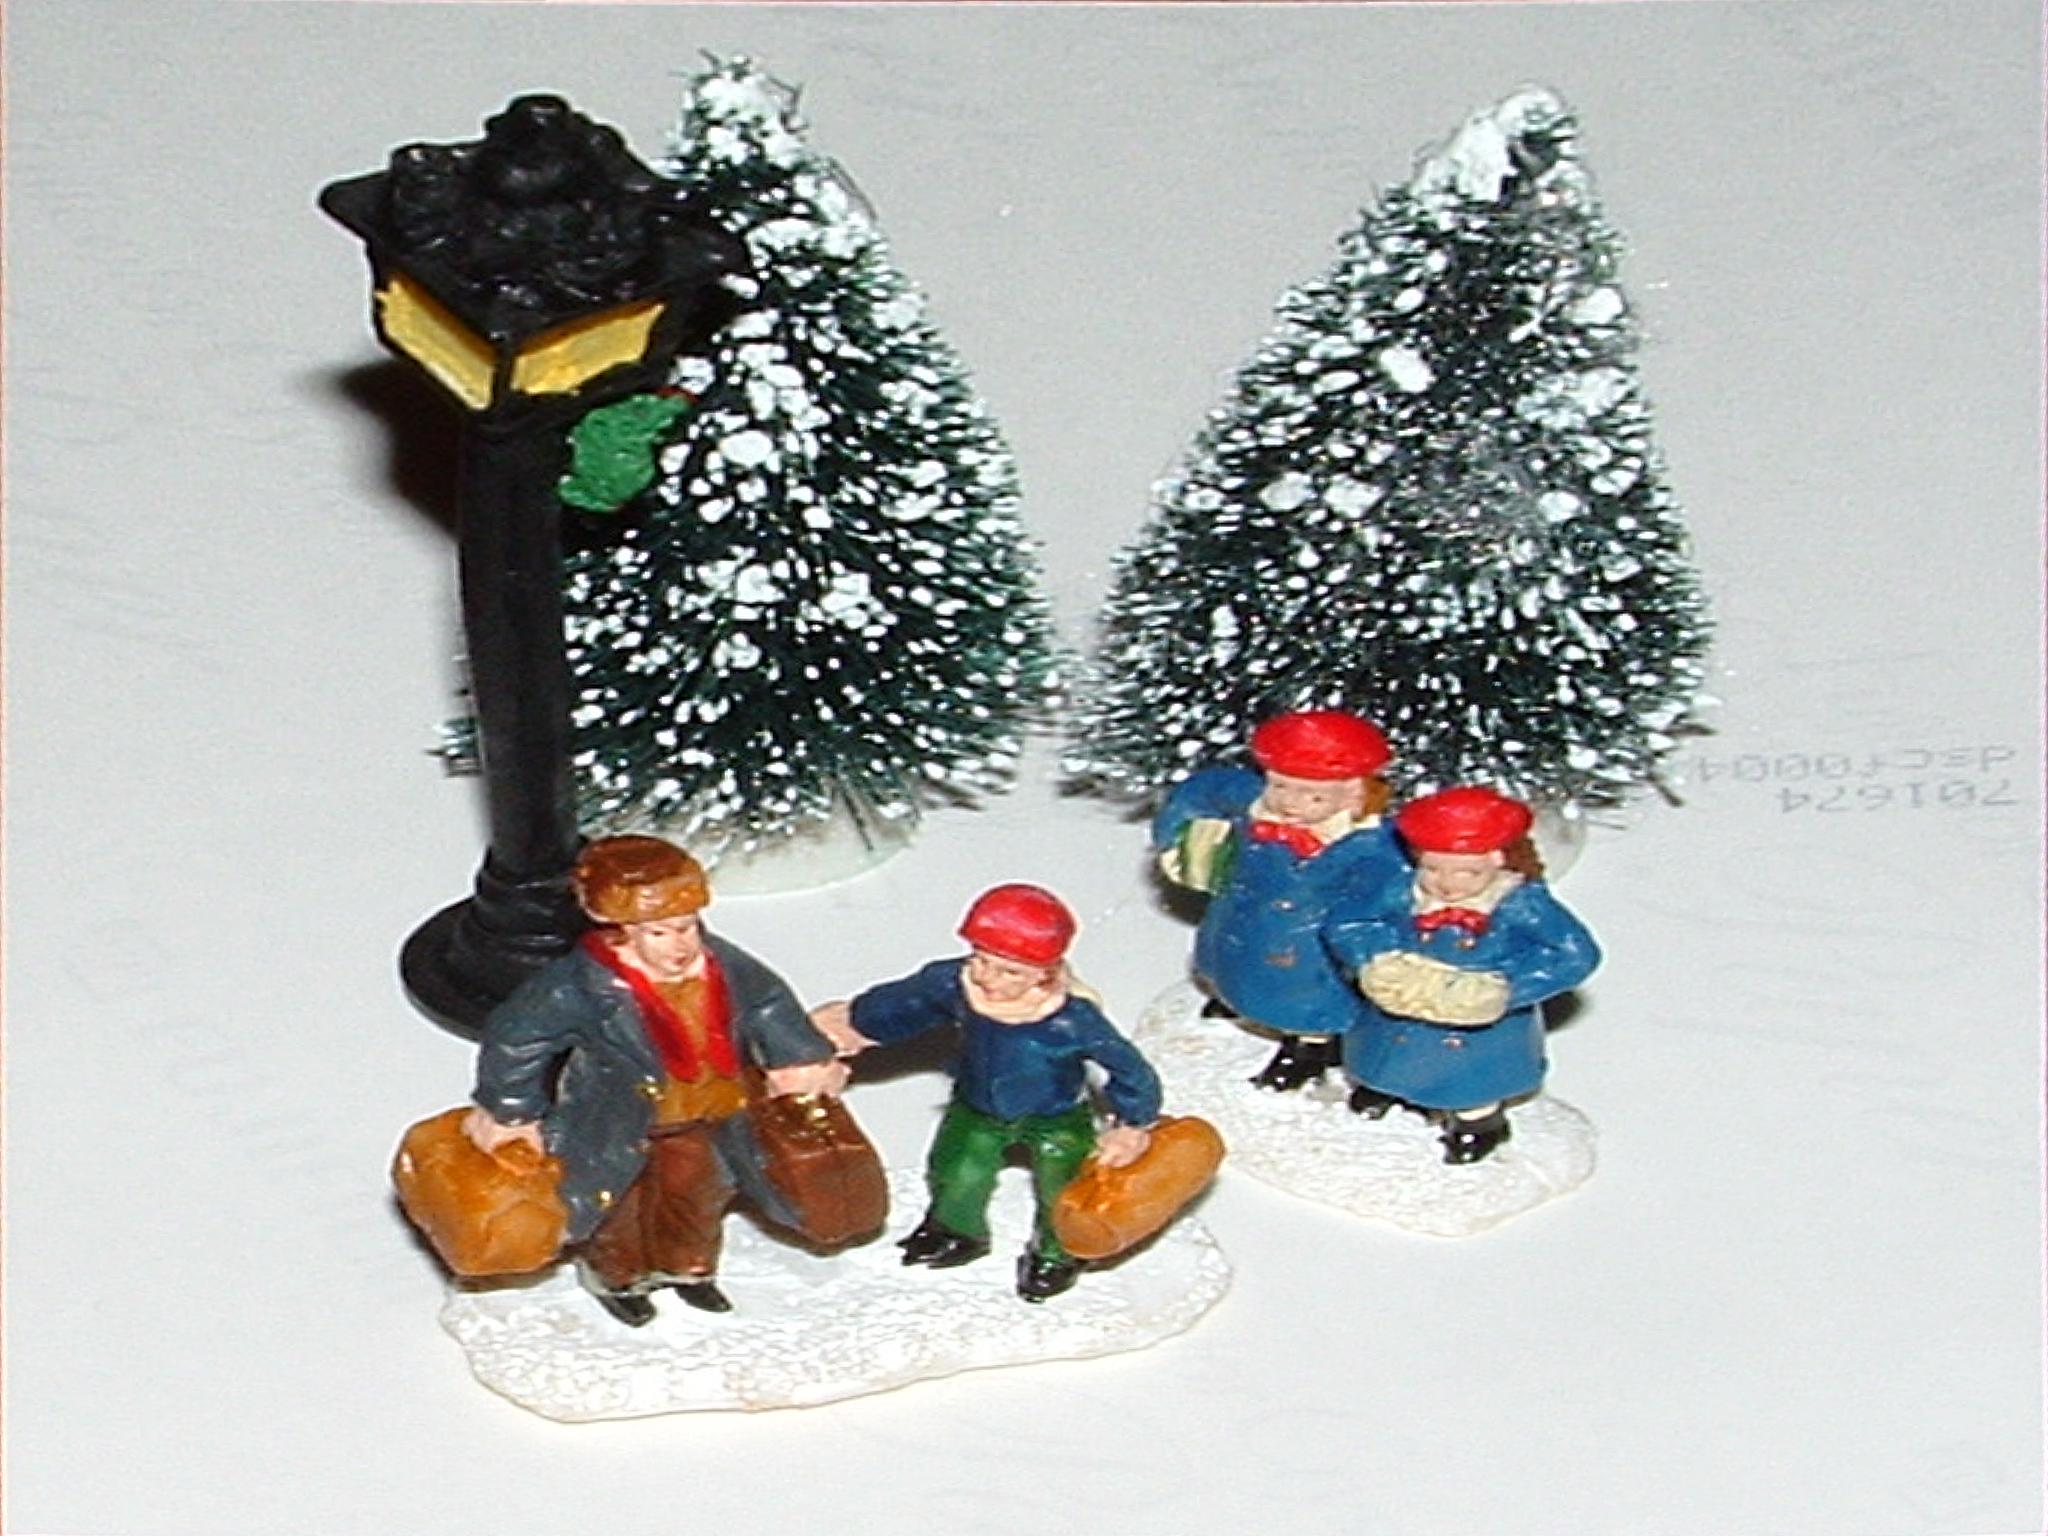 The result |
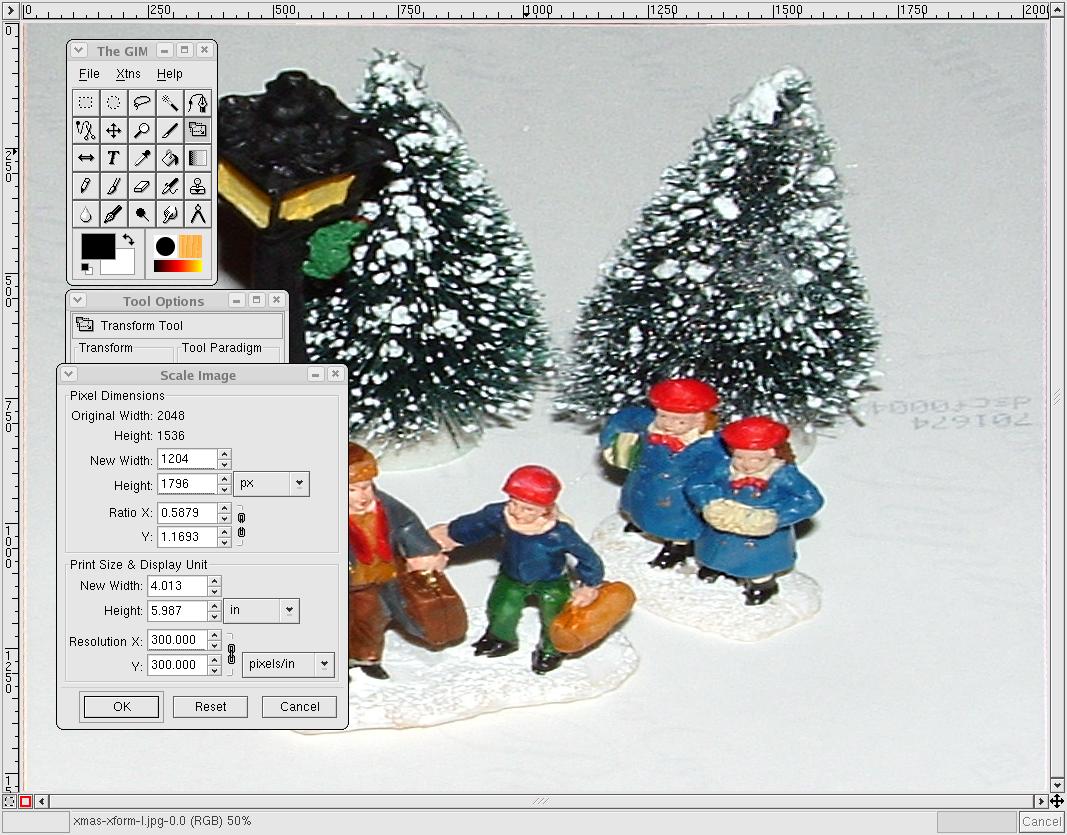
Perpective transformation: You'll need an image processing program that lets you perform a reverse (corrective) perspective transformation. This will undo the keystoning caused by the camera angle, and restore the target frame back to a rectangular shape. I use The GIMP, which is a very good (and free) program available for Windows as well as UNIX/Linux systems, but you may prefer to use Photoshop or your own favourite. The GIMP's "Transform Tool" (under the pop-up menu's "Tools/Transform Tools/Transform" sub-menu) is what we need. From its options dialog, select a Perspective transform, and a corrective (reverse) paradigm. Then click on the image to be transformed (we'll need to repeat this for both the left- and right-eye images), which will overlay a grid pattern. For each of the four corners of the grid, grab the corner marker, and drag it to the corresponding corner of the target frame. (It's a good idea to zoom in, with a high magnification, and scroll to each corner of the target frame, to check and adjust alignment.) Once the grid is aligned, click the Transform button, and let The GIMP do its magic. |
 Rescaling the image |
 The result |
Rescaling: After the above transformation, we've got an image that restores the perspective of the target frame (as it we had shot directly from above), but the proportions are all wrong. We shot a portrait oriented (tall) frame, using landscape (wide) mode, which was necessary to allow for the left- and right-shift of the camera, without cutting off any part of the frame in either shot. We can correct the proportions, and prepare images of the right size and shape for printing, using the "Scale image" operation (under the pop-up menu's "Image" sub-menu). I usually set the X and Y resolution to 300 pixels/inch, then set the pixel dimensions to 1204x1796 (making sure to unlink the X and Y ratio, since the point is to change proportions). This gives me an image that matches the size of an A6 print, which is approximately (but not exactly) 4x6 inches. You may notice that although the background now matches the proportions of the original target frame, the objects appear to be streched vertically, and the taller the object the more extreme the streching is. Also, comparing left- and right-eye images, objects seem to tilt to the right or left, respectively. This may look wrong, but it's what we want. The stretching and tilting will be undone by the viewer's eyes and brain, when the final phantogram is viewed at the appropriate angle and distance, to recreate the objects' original proportions (and give us the illusion of height from a flat print). |
 Making the anaglyph |
 The result |
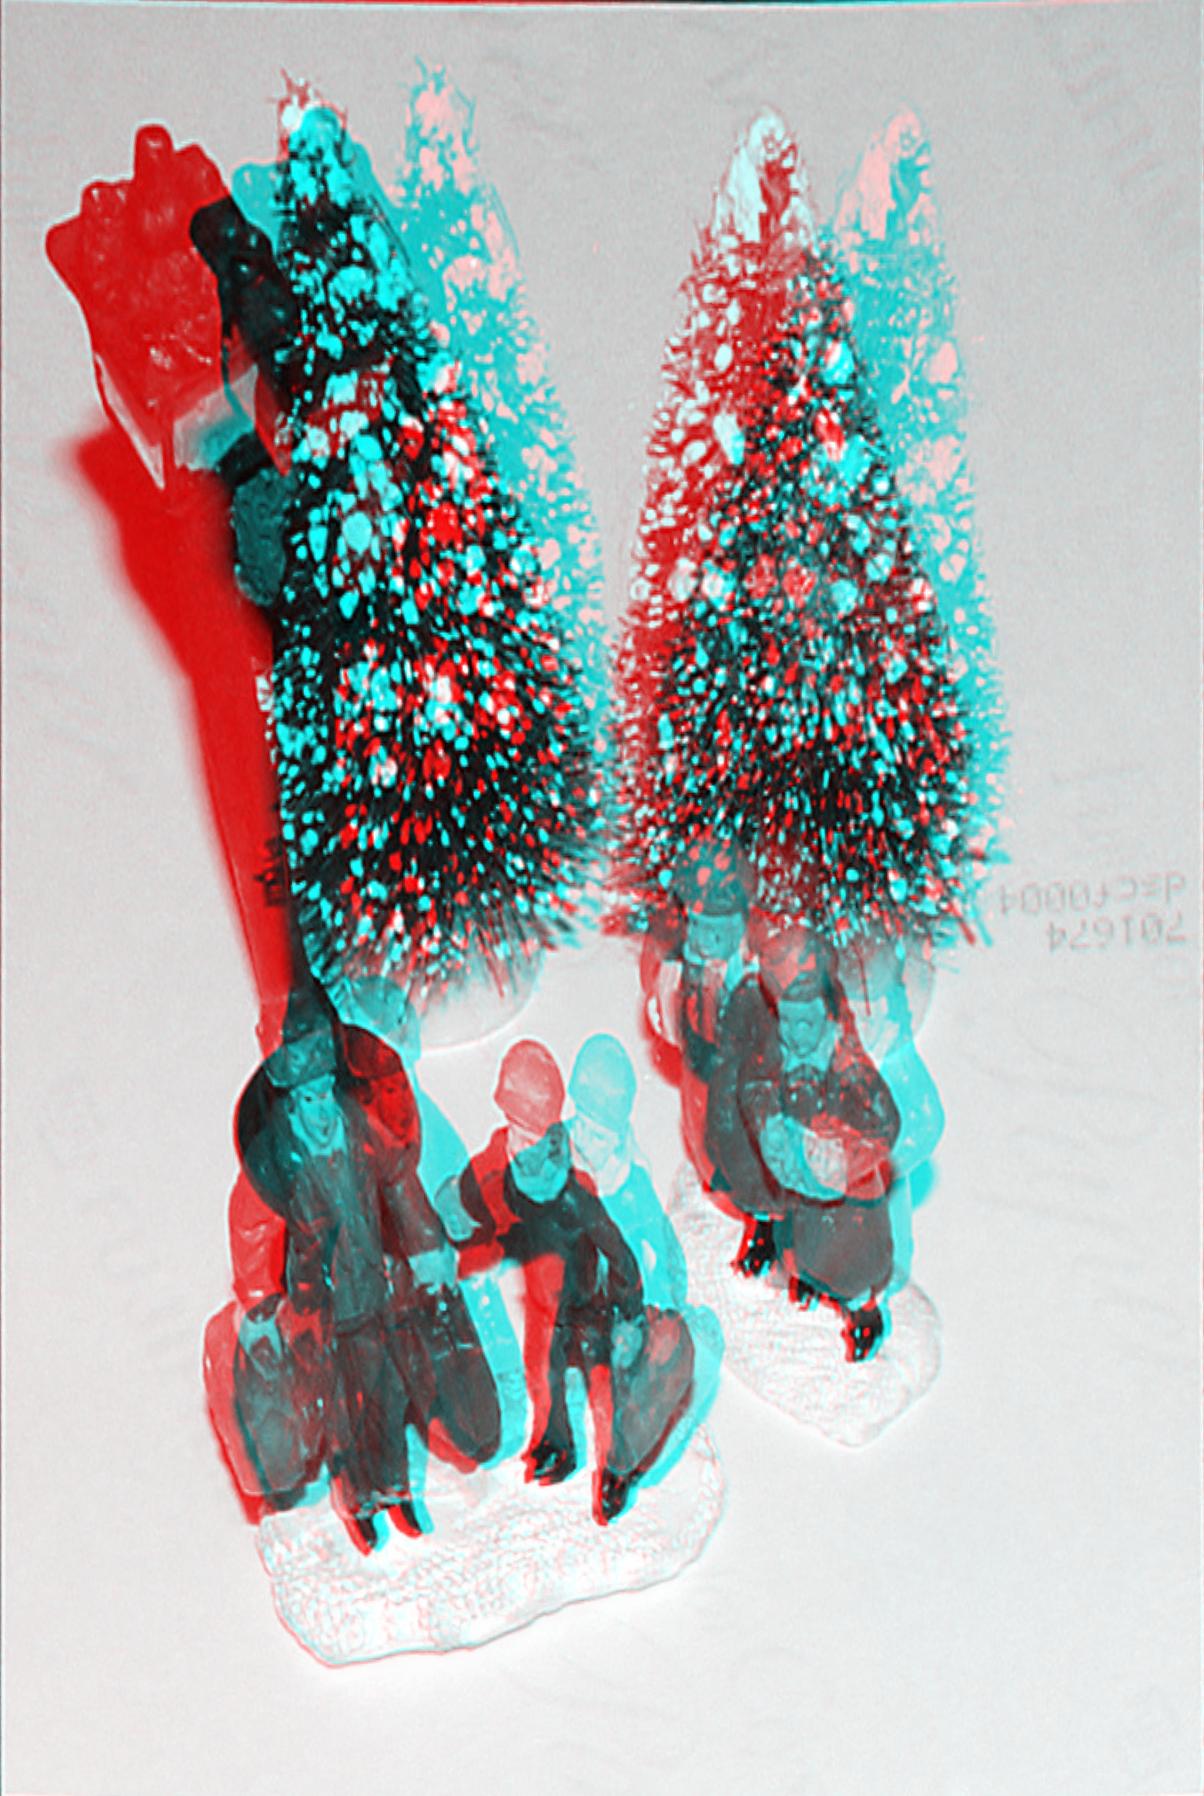
Making the colour anaglyph: The separate left- and right- eye images now need to be combined into one, in such a way that they can be printed as one image, but then separated out again by the viewer's eyes (through coloured 3D glasses). This combined image, called a colour anaglyph, can be fairly easily created by following a manual procedure for The GIMP, or for Photoshop. If you're using The GIMP, you can instead use a stereoscopic plug-in to do the work for you. After the "Script-Fu" stereoscopic plug-in is installed, you can access it from The GIMP's main (Toolbox) window, under the "Xtns/Script-Fu/Stereoscopic/Anaglyph..." menu. On the Anaglyph dialog, match up the right image file (window) names to each of the Left Image and Right Image, and select an Anaglyph Type of "Red-Cyan (Color)". Click OK, and the script will pop up a new image window with the result. Put on your colour 3D glasses and have a look! |
 A black/white anaglyph |
 The result |
Avoiding retinal rivalry: With some images (such as the sample above), you might notice discrepancies between what each eye sees, due to differences in colour and brightness, which might make parts of the image appear to flash, or be hard to focus on. This is retinal rivalry, which can ruin the 3D effect, and can also leave you with a headache. The problem is worse with objects that use bright colours, especially red, blue, and green. This sort of annoyance can be decreased or eliminated by using grayscale (black and white) images to produce the anaglyph. With The GIMP, you use the same procedure as before, but select an Anaglyph Type of "Red-Cyan (B&W)", which will do it for you (so you don't have to convert your images to grayscale yourself). Since the colour has been eliminated from the images, and is now used strictly to allow separation by colour filters, retinal rivalry due to unfortunate colours should also be completely eliminated. In some cases, it might be possible to reduce that effect by juggling the colour levels, rather than completely eliminating them, using different anaglyph methods. (Another cause of retinal rivalry would be if anything changed between the left- and right-eye shots, but we can't fix that.) With some images, you'll notice ghosting (where the one eye's image is somewhat visible to the other eye), which can be distracting and can also ruin the 3D effect, if it's bad enough. Ghosting will be reduced in the black/white anaglyph if it was due to clashing colours, but will still be a problem if it's just due to high contrasts in brightness between adjacent objects, or between objects and background. |
 The Final Product |
 Viewing a Phantogram |
The payoff: You might want to dress up the image with some overlaid text or graphics (such as a logo), but that's up to you. Your phantogram is now ready for printing. Now, get out your pair of red-cyan or red-blue 3D glasses, with the red filter over your left eye. The phantogram should be laid flat on a horizontal surface. Remember that the ideal spot for viewing is at the same relative angle and distance from the print as the camera was from the target frame. (This is called the "sweet spot.") My sample phantograms are best viewed at an angle of about 45 degrees, from a distance of about 20 inches (50 cm). The stereoscopic effect should be quite remarkable, with objects appearing to be standing above the surface of the print. |
 AnaBuilder Ghost Buster Filter |
 The result |
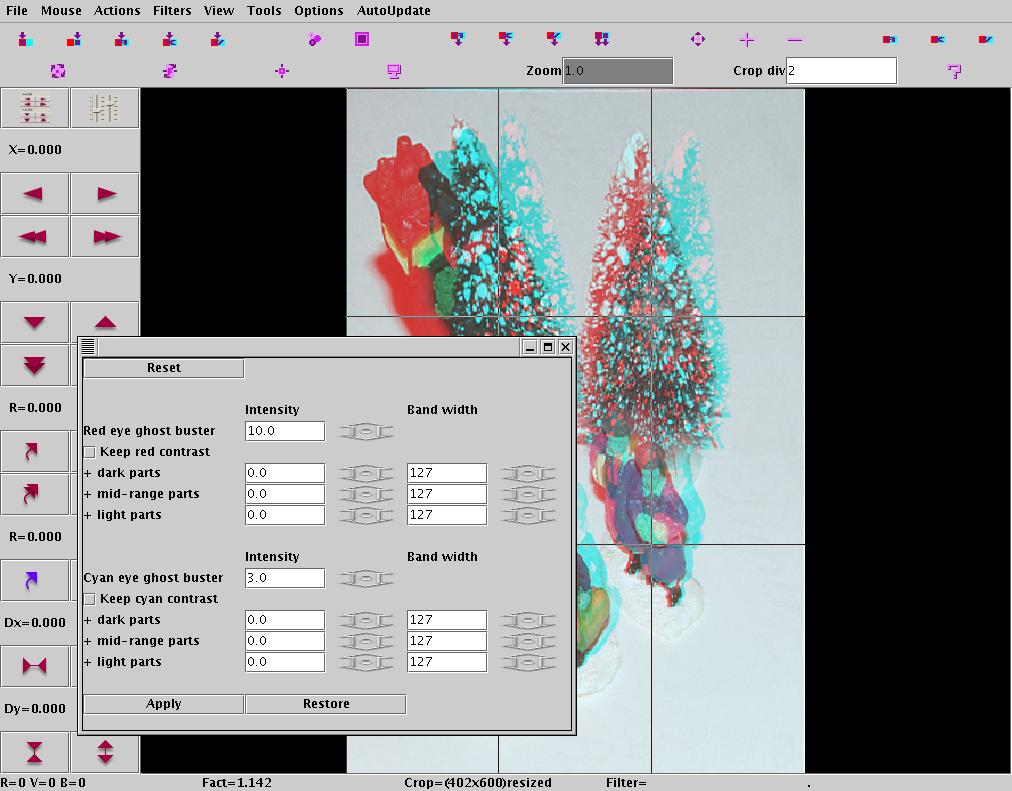
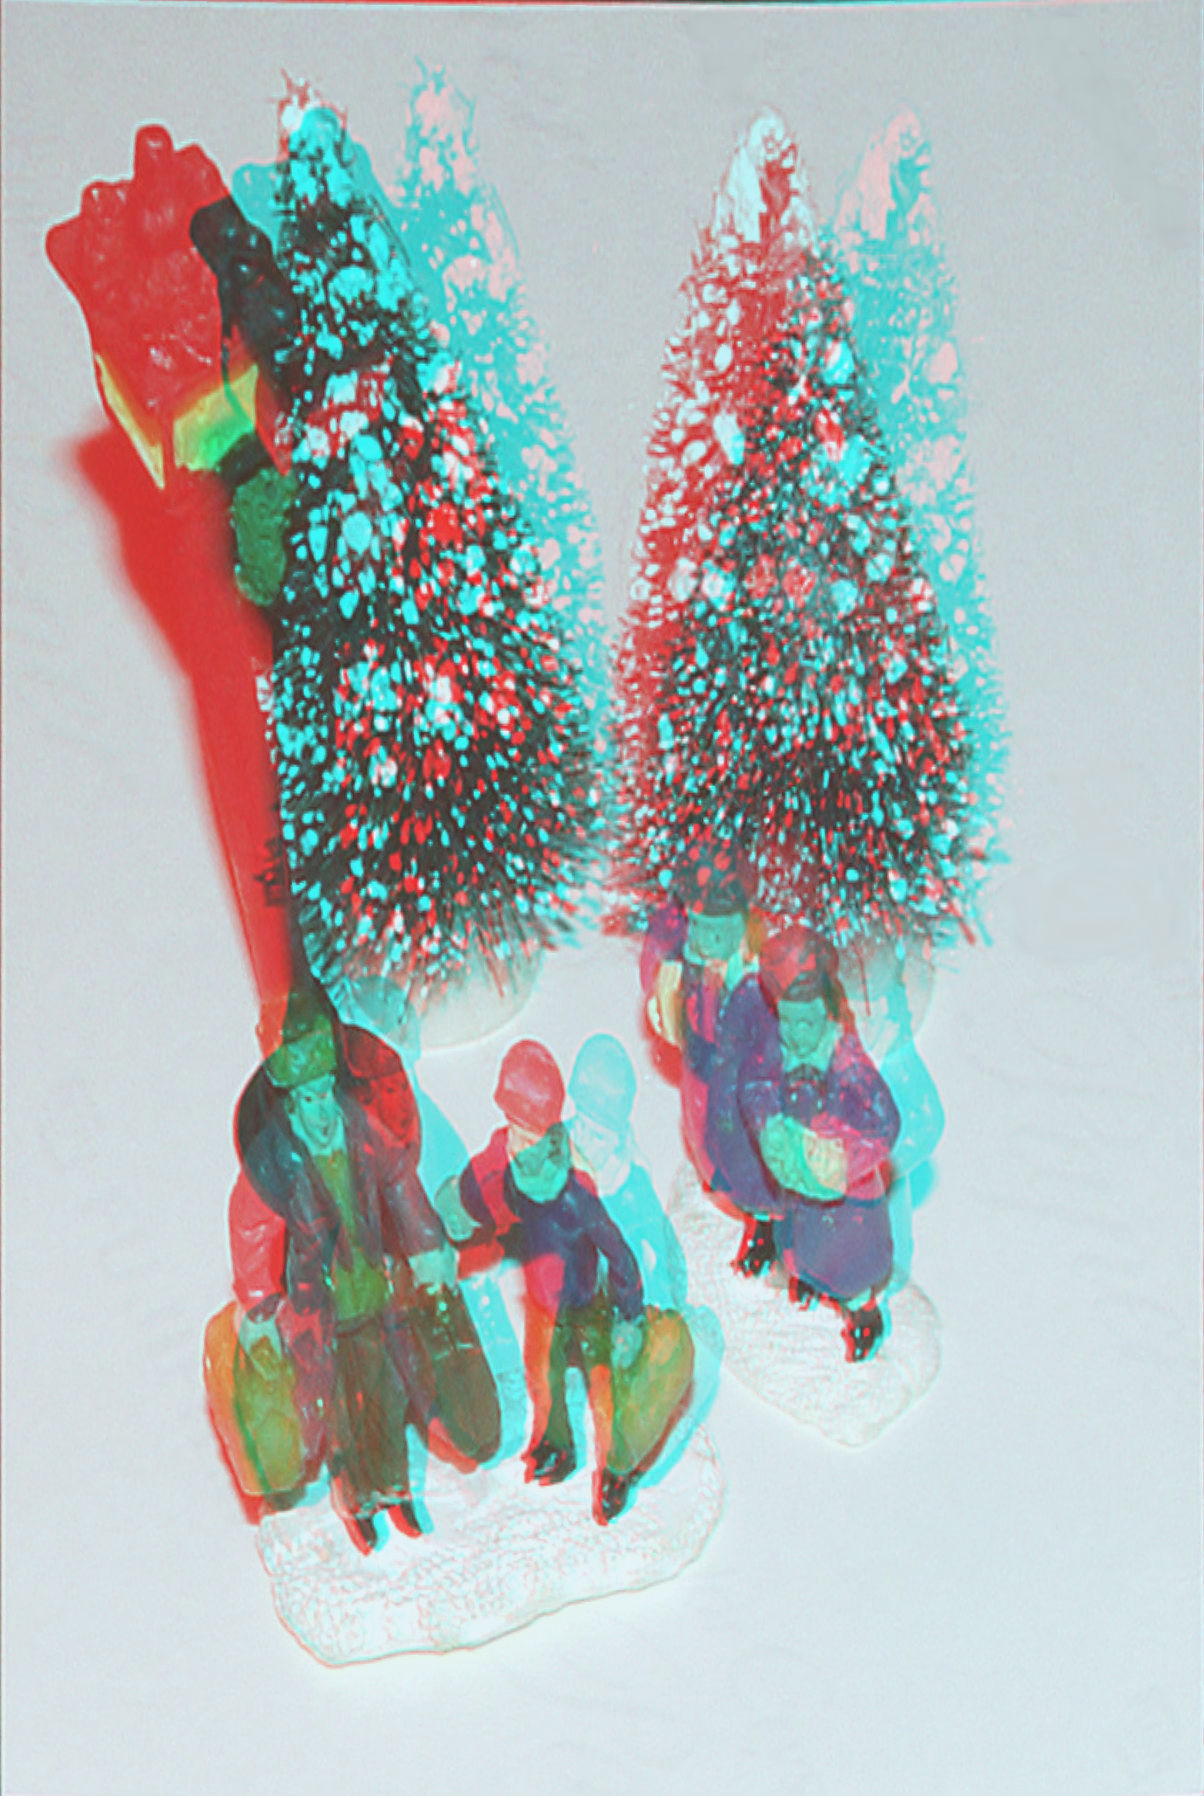
New and improved: A good program for helping to eliminate retinal rivalry and ghosting is AnaBuilder. This is a freeware program, written in Java, so it will run on just about any type of computer and operating system. Ghosting can be reduced, for example, by using AnaBuilder's Ghost Buster filter, and playing around with settings until the desired effect is achieved. |
 |
This work is licensed under a Creative Commons License. |
Some patents may apply to the process of making phantograms for commercial purposes. |