Install a Linux distribution
Install a Linux distribution
- Install the Linux distribution either on your laptop or in a virtual machine.
We’re going to move forward here with the assumption that you’ve selected Ubuntu. You’re more than welcome to try other distros, but you’re on your own for getting it installed.
You’ve got two choices here in terms of where you install Ubuntu:
- A virtual machine.
- Real hardware.
At a certain points these paths start together, diverge, then converge again.
Where are you installing to?
Before you start, decide where you’re going to install it:
- Real hardware. Maybe you’ve got an old laptop. Maybe you’re using the lab computer. Maybe you’re feeling very confident that you can get Linux working on your laptop with zero issues just before your final exams. Do this only if you know you’re going to be OK going forward (we take no responsibility for lost data or lost use of your machine).
- A virtual machine.
If you’re installing in a VM, VirtualBox is fine. … unless you’re using an M1 Mac.
If you’re using an M1 Mac, you should uninstall VirtualBox and instead install UTM. UTM is free and open source. You can support the developer by buying it on the App Store, or you can download it from GitHub.
Download the ISO
Once you’ve decided where you’re going to install, we’ve got to
actually get our Linux distribution. Most Linux distributions are
distributed as disk images, but the kind of disk image here is a CD or
DVD. Disk images for CDs and DVDs have an extension of .iso
and are generally called “ISOs”.
Why “ISO”?
They’re called ISOs because it’s a disk image that uses a format called “ISO 9660”. ISO 9660 is a “file system”, it’s a binary data structure that’s used to represent files, folders, and metadata on a disk or other hardware.
Here’s a link to download .iso files:
https://cdimage.ubuntu.com/jammy/daily-live/current/If you’re using Windows or a Mac with an Intel processor, download
jammy-desktop-amd64.iso. If you’re using a Mac with Apple
Silicon, download jammy-desktop-arm64.iso.
Set up your machine
Here’s where our instructions diverge for a while: if you’re using a Virtual Machine, read below about either VirtualBox or UTM. If you’re planning on installing Linux onto an actual machine, read more in Real hardware.
Virtual machines
If you don’t want to commit to installing Linux on a real machine, that’s totally OK. Thankfully, it’s straightforward to install Linux in a VM.
This is so common, in fact, that a lot of VM software can completely automate the installation of Linux from a disk image. We don’t actually want to do that, we want to go through the install process so that we can see what it looks like. The goal here is to make sure we’re setting up our VM to allow us to go through the install process.
VirtualBox
Open VirtualBox and start creating a new virtual machine by either clicking on the “New” button in the toolbar at the top, using the Machine menu and selecting New…, or by pressing Control or Command+N on your keyboard. VirtualBox is going to ask you for some details about your new VM:
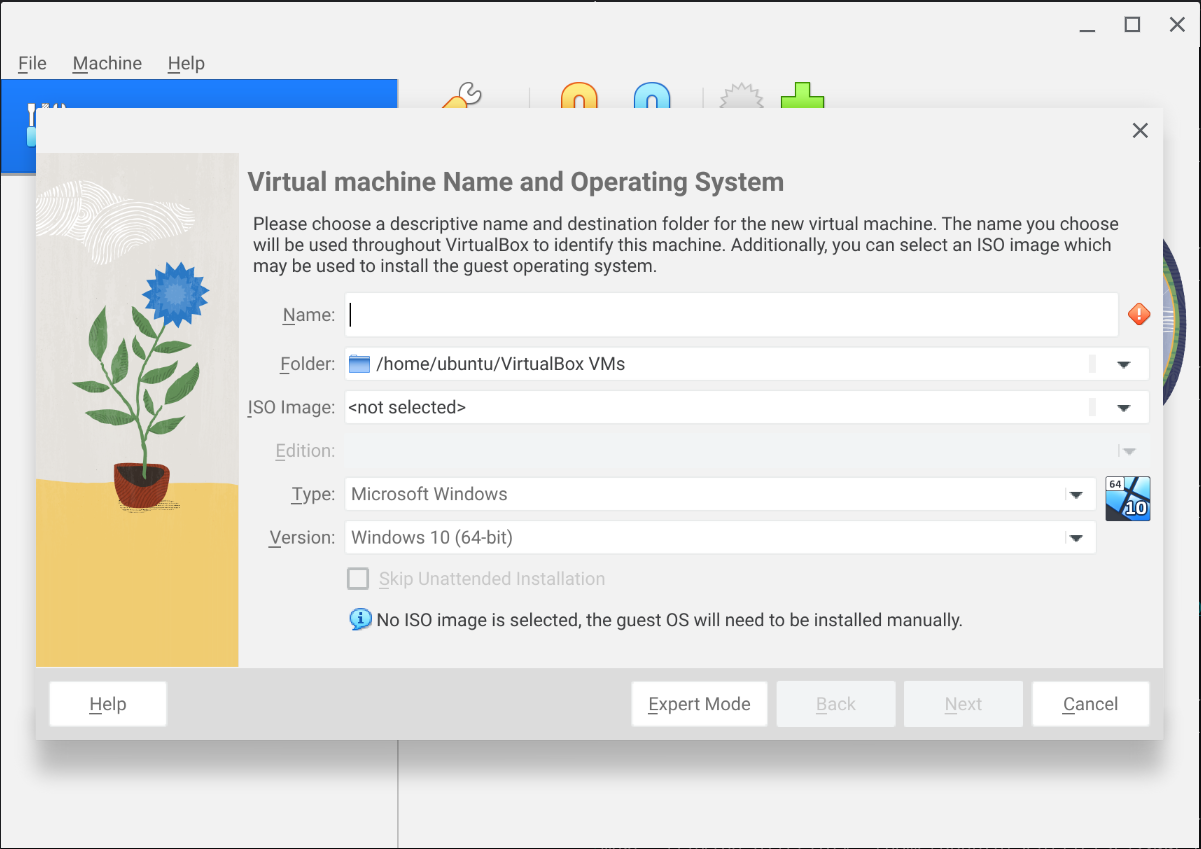
You should fill in the details here:
- Name: Give your VM a name! You can name it anything you like, but like naming variables, pick something descriptive.
- Folder: You can choose to put your VM’s files somewhere else, but it’s OK to leave this as the default.
- ISO Image: Click on the arrow on the far right side of this field and select “Other…”. Now find the ISO you downloaded and select it.
Once you select the ISO, VirtualBox is going to change its interface a little bit and helpfully let you know that the OS can be “unattendedly” installed (I guess if you write it into a program is becomes a word). You should check off “Skip Unattended Installation”, then click “Next”.
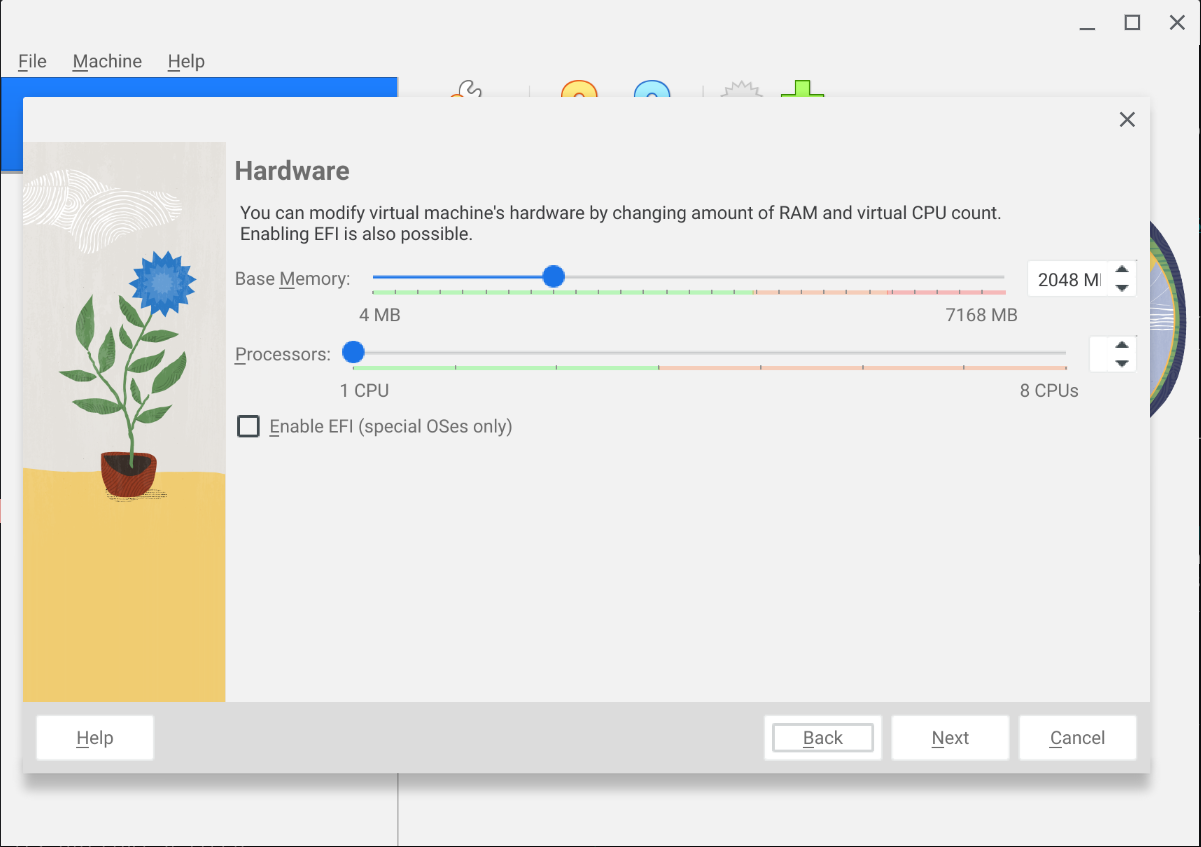
On the next screen you’ll get a chance to choose some options for hardware. VirtualBox has selected sane defaults here, but you can do things like giving your virtual machine more RAM, or more CPU cores to work with:
Click “Next”, and VirtualBox will let you configure the virtual hard drive. Again, VirtualBox has selected a sane default here of 25GB, but you can choose sizes up to 2TB.
The virtual hard drive you create here will literally be a file on your file system. VirtualBox gives the guest OS the idea that there’s a real hard drive, and any reads or writes that the guest OS makes will be forwarded to this file.
VirtualBox won’t actually make a 25GB file (thankfully!) by default. Instead, it allocates only as much as is actually being used by the guest OS. At the beginning this will be closer to a few GB, maybe up to 10GB, depending on the software you choose to install during setup.
You can get VirtualBox to allocate a full 25GB file at the beginning by ticking the “Pre-allocate Full Size” check box, but you shouldn’t do this right now.
Why would you want to pre-allocate the full disk??? That seems like a big waste of space if you don’t actually use the whole hard drive, you can’t get that 25GB back!
There are some compelling reasons why:
- Performance. If you pre-allocate the entire disk, VirtualBox won’t have to decide if it needs to make the file bigger while the guest is running because the disk is already big enough. The reality of this, though, is that unless your guest is constantly writing stuff to disk (it’s not), the additional performance gain isn’t usually worth the cost of losing that space in the host.
- Making sure you’re not oversubscribing your disk. If you’re in a situation where you’ve got many guests running, you can guarantee that all guests will have enough disk space if you pre-allocate the disk space. If you don’t pre-allocate, it’s possible for you to have many guests trying to use more space than is available on the physical drive (e.g., you’ve got 20 guests where each have a 2TB virtual disk and you’ve got a 250GB physical disk).
Finally, click “Next”, optionally review the details of your VM, then click “Finish”. Hooray :tada;! You just created another VM!
Now it’s time to Boot your VM.
UTM
UTM actually has pretty good documentation on how to get Ubuntu set up.
Some (minor) differences and explanation:
- You’re going to be using a Desktop ISO for Ubuntu, so you don’t need
to install
ubuntu-desktopafter you’ve finished. - Similar to VirtualBox above: UTM picks pretty reasonable values for the amount of memory and disk space that the virtual machine is going to get.
- Similar to VirtualBox above: The virtual hard drive you create here will literally be a file on your file system. UTM gives the guest OS the idea that there’s a real hard drive, and any reads or writes that the guest OS makes will be forwarded to this file.
- UTM makes folder sharing (a folder on your host will be made available in your guest) a little easier in that it’s a set up option.
- The last step in the UTM docs (step 9) is important:
- The reboot will almost certainly fail. You should power off the machine yourself.
- After you power off the machine, “unmount the installer ISO” by looking at the details of the machine on the right, scrolling down and finding the “CD/DVD” drop-down and choosing “Clear”.
Once you’ve got the VM set up, you can move on to the Boot section.
Real hardware
If you’re planning to run this on real hardware, then you’ve got to prepare your boot media. Boot media is either a USB drive or an actual DVD.
You can either burn a DVD (Windows 10+ supports burning DVDs from ISOs out of the box), or you can create a bootable USB drive.
You can create a bootable USB drive using software like Rufus or Ventoy.
Once you’ve got the bootable drive created, restart your computer. As the computer’s coming up, you can usually keep hitting the Escape key on your keyboard to select which device to use to boot.
Boot
Start your VM or your machine (we’re converging here again).
Follow the guide here: https://ubuntu.com/tutorials/install-ubuntu-desktop#4-boot-from-usb-flash-drive
If you’re asked to log in once the image starts up, the username is
ubuntu with no password (just press Enter when
you’re asked for a password).
If you’re asked to log in once the image starts up, you may need to launch the installer manually, it should be an icon on the desktop that you can double-click on.
After you reboot, you should have a working Linux install 🎉.
Further reading
Getting Linux installed can be straightforward. Ubuntu and Debian make most of the choices for you (choices that you probably don’t even care exist), but other Linux distributions give you all the choices.
The most complete way to install Linux is from scratch (going through the process of bootstrapping your system by compiling your compiler, then the kernel, then all software). There’s a very good guide in Linux From Scratch. Linux From Scratch is time-consuming, but rewarding in the sense that you get to know a little bit about how all the different pieces fit together.
Learning Modern Linux is a good book that gives a general overview of concepts that are related to all Linux distros, including stuff we’ve seen before in general command-line usage.